
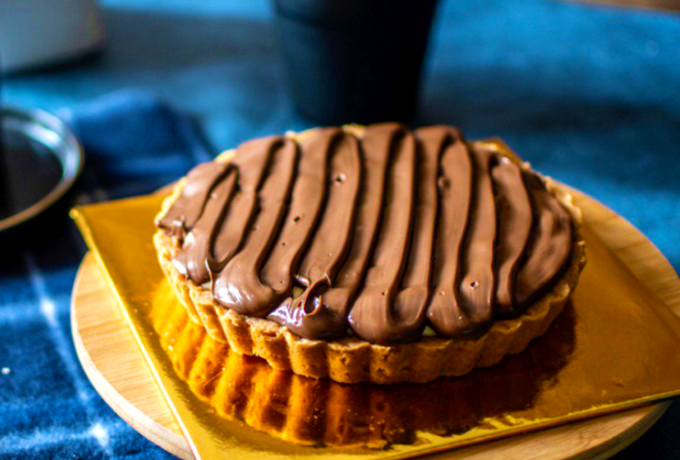
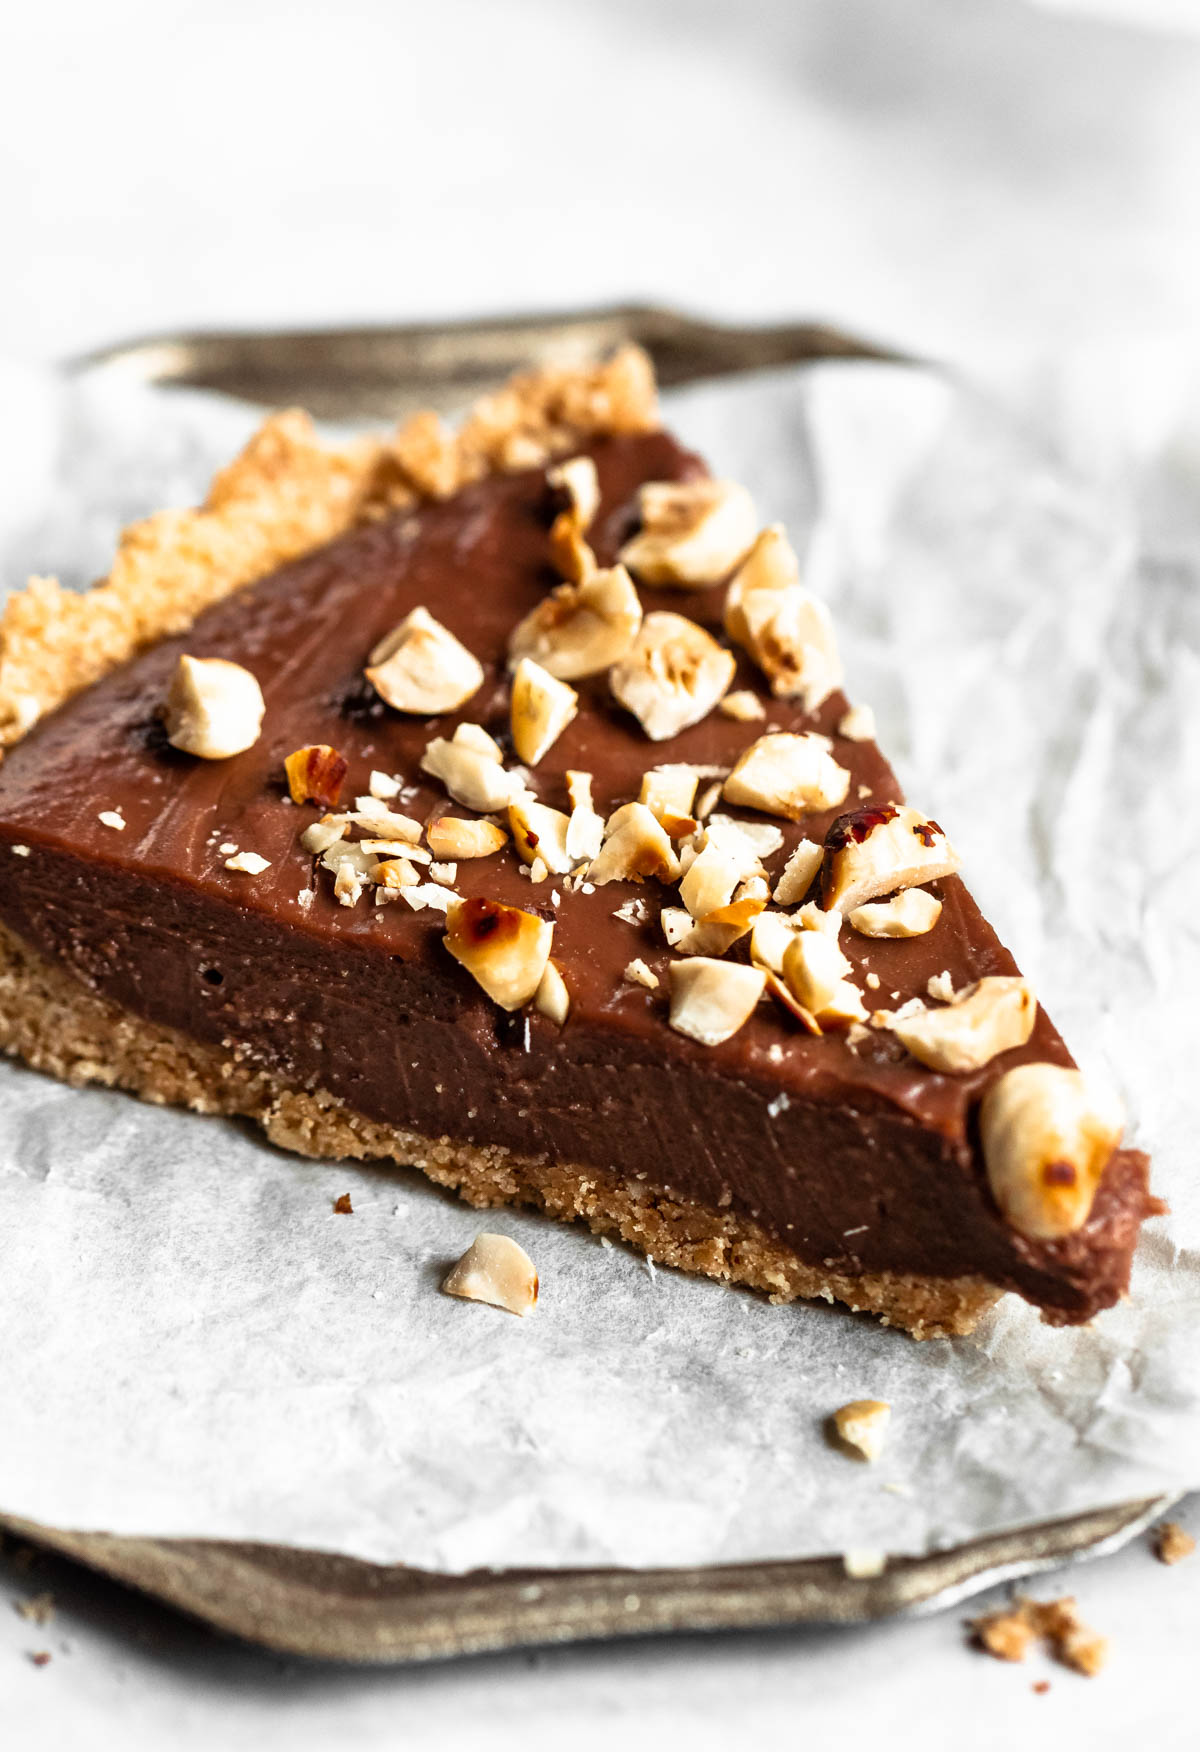
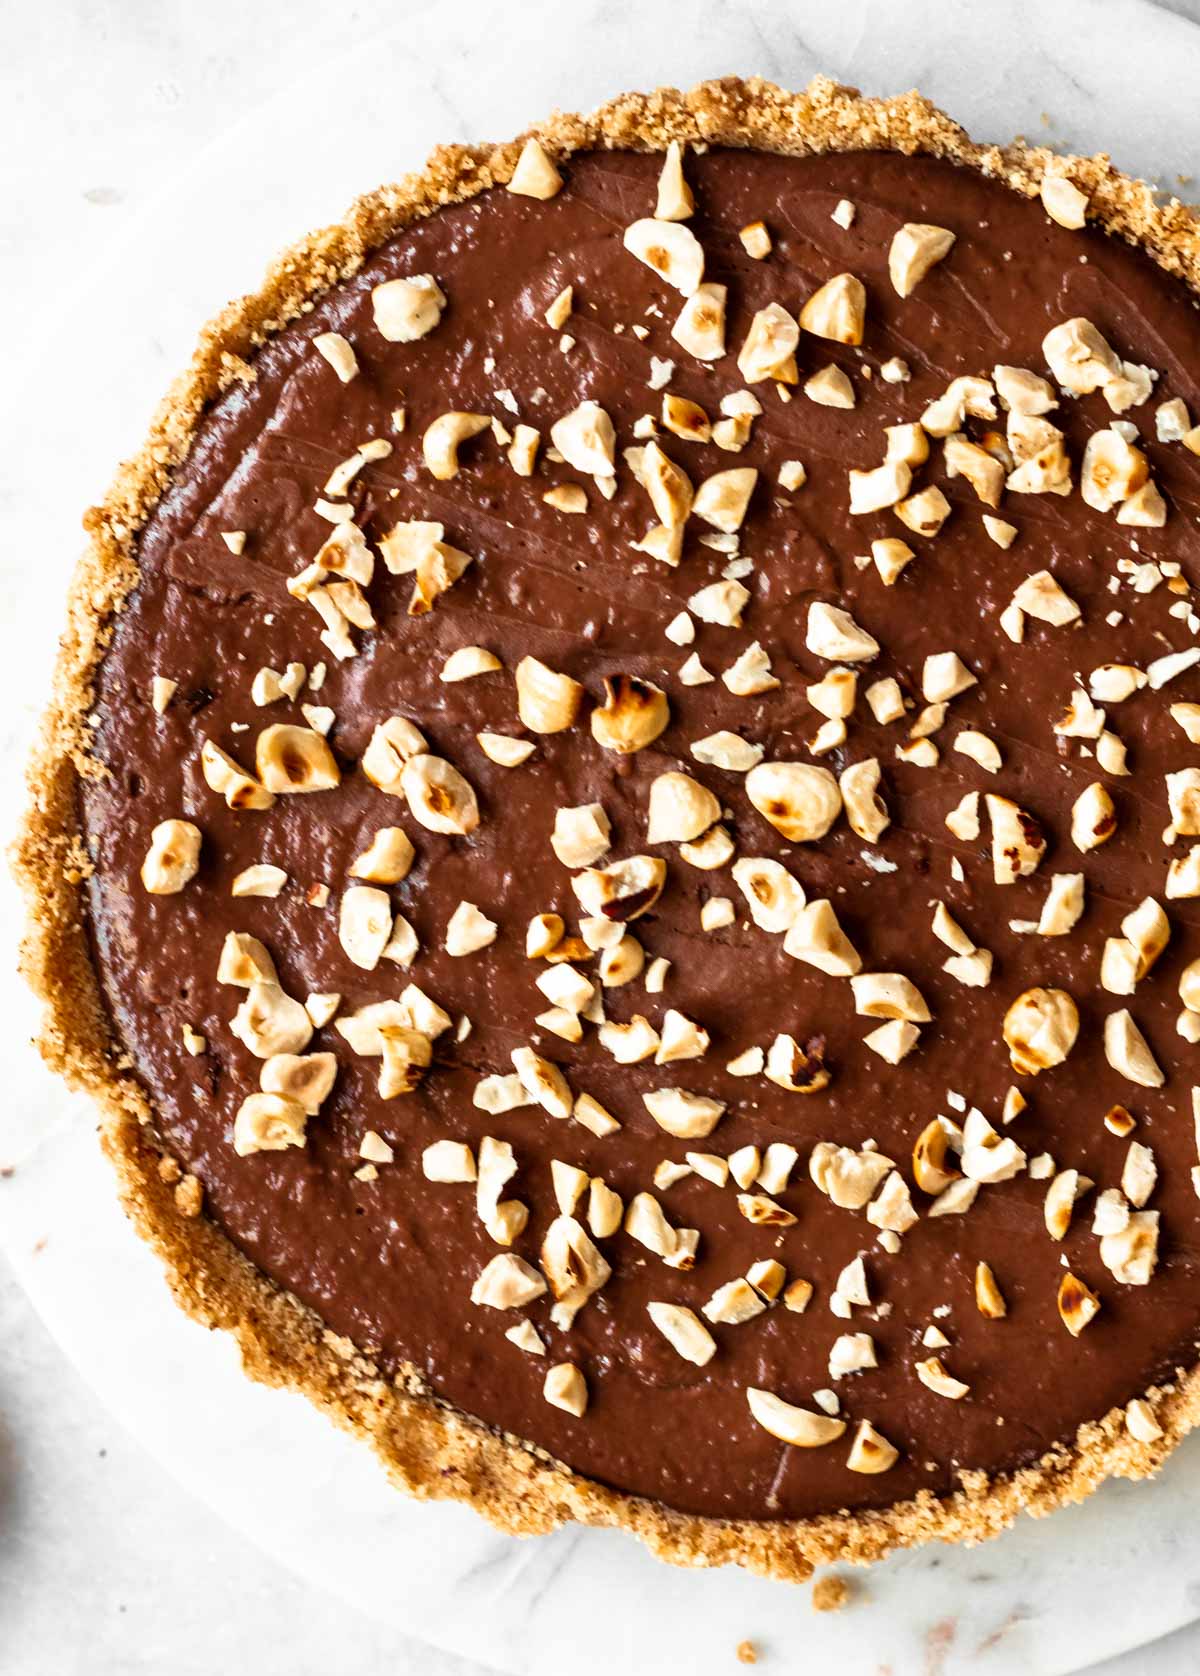
This Nutella tart is made with an easy hazelnut tart crust, filled with a decadent and creamy Nutella filling, and topped with chopped toasted hazelnuts.
This recipe comes together in half an hour, made with super simple ingredients, perfect for hazelnut and Nutella lovers, and made with an incredibly creamy filling, which is topped with chopped hazelnuts that complete this recipe into the perfect tart.
Hey there, dessert lovers! If you’re on the hunt for a treat that’s gonna blow your mind and make everyone at the table beg for seconds, lemme introduce you to the Nutella Cheese Tart. This lil’ slice of heaven mixes the gooey, chocolate-hazelnut magic of Nutella with the creamy, tangy kick of cheese, all nestled in a killer crust. Whether you’re a baking newbie or a kitchen pro, I’m here to walk ya through how to whip up this scrumdiddlyumptious dessert that’s perfect for any occasion. So, grab a spoon (or just read on for now), and let’s dive into why this tart is the bomb and how you can make it at home!
What’s a Nutella Cheese Tart, Anyway?
Before we get our hands messy, let’s break it down real simple. A Nutella Cheese Tart is a dessert that combines two star players: Nutella, that spreadable chocolate-hazelnut goodness we all sneak by the spoonful, and a cheesy element, usually cream cheese, that adds a rich, smooth texture. It’s typically set in a tart crust—think a crispy base that holds all that yummy filling together. The best part? You can go no-bake for an easy-peasy vibe or bake a fancy crust if you’re feelin’ extra. It’s indulgent, it’s decadent, and it looks like you spent hours on it, even if you didn’t!
This treat is perfect for satisfying sweet cravings impressing guests at a dinner party, or just treating yourself after a long day. The contrast of the nutty chocolate with the creamy cheese is straight-up addictive. Plus, there’s tons of ways to tweak it to your liking which I’ll get into later. For now, let’s focus on the easiest, crowd-pleasin’ version a no-bake Nutella cheese tart with a chocolate cookie crust. Trust me, this is gonna be your go-to!
How to Make a No-Bake Nutella Cheese Tart: Step by Step
Alright, let’s roll up our sleeves and make this bad boy. I’m givin’ you a no-bake recipe first ‘cause it’s super straightforward and don’t require no oven drama. This version uses a chocolate cookie crust and a creamy filling that sets in the fridge. Here’s what you need and how to do it.
Ingredients You’ll Need
Here’s a quick rundown of what to grab from your pantry or the store, I’ve kept it basic so you ain’t gotta hunt down weird stuff,
| Ingredient | Amount | Notes |
|---|---|---|
| Chocolate cookies (like Oreos) | 36 cookies | Double chocolate or regular, your call |
| Salted butter (melted) | 5 ½ tablespoons | Unsalted works too if that’s your jam |
| Heavy whipping cream (cold) | ¾ cup | Gotta be cold for whippin’ up right |
| Powdered sugar | 3 tablespoons | For a touch of sweetness in the cream |
| Cream cheese (softened) | 4 ounces | Full-fat, block style, room temp please |
| Nutella | 1 cup | Brand name or generic, it’s all good |
| Vanilla extract | 2 teaspoons | Adds a lil’ depth to the flavor |
| Pinch of salt | Just a tiny bit | Balances the sweetness |
For servin’, you can fancy it up with whipped cream, chocolate shavings, or chopped hazelnuts if you got ‘em.
Step-by-Step Instructions
-
Make That Crust, Yo!Start by crushin’ up them chocolate cookies into fine crumbs. I toss mine in a food processor and blitz ‘em till they’re like sand No processor? Throw ‘em in a zip-top bag and smack ‘em with a rollin’ pin—works like a charm. Mix those crumbs with the melted butter in a bowl till it looks like wet dirt Then, press this mix into a 9-inch tart pan. Really push it down hard with the back of a spoon or a measurin’ cup so it don’t crumble later. Get it up the sides too for that classic tart look. Pop this in the fridge to chill while you do the next bit.
-
Whip Up the Cream.
Grab a bowl and pour in that cold heavy cream. Using an electric mixer (or a whisk if you’re feelin’ strong), beat it on high till you get soft peaks—basically, when you lift the beaters, the cream holds a shape but flops over a bit. Toss in the powdered sugar halfway through to sweeten it up. Once done, scoop it into a cup and stick it back in the fridge to stay cool. -
Mix the Nutella and Cheese Magic.
In the same bowl (no need to wash it, we ain’t fancy here), beat the softened cream cheese till it’s smooth. Add in the Nutella, vanilla extract, and that pinch of salt. Mix it all up till it’s one happy, creamy family. It’s gonna smell amazin’, but don’t eat it yet! -
Fold It Together.
Take about a third of your whipped cream and stir it into the Nutella mix to lighten it up. Then, grab the rest of the whipped cream and gently fold it in with a spatula. Don’t go mixin’ like a madman—be soft so you don’t knock out all the air. Fold by scoopin’ from the bottom of the bowl and flippin’ it over the top. Keep goin’ till it’s all combined. -
Assemble and Chill Out.
Spread this dreamy fillin’ into your prepared crust. Smooth the top with a spatula if you’re feelin’ artsy. Now, cover it (or don’t if you’ve got a cake dome) and chuck it in the fridge for at least 6 hours. Overnight is even better if you can wait that long. This gives it time to set so it ain’t a sloppy mess when you cut it. -
Serve It Up!
When it’s ready, slice it into pieces and top with a dollop of extra whipped cream or some chocolate shavings for that wow factor. Dig in and watch everyone lose their minds over how good it is.
Tips for Nailing Your Nutella Cheese Tart
I’ve made this a buncha times, and lemme tell ya, a few small tricks can make or break your tart. Here’s my insider advice to get it perfect:
- Crust Game Strong: Spend a hot minute pressin’ that crust into the pan. If it’s too loose, it’ll fall apart when you slice it. Use the back of a measurin’ cup to pack it tight. If you want it extra sturdy, you can bake it at 350°F for 10 minutes, but it ain’t necessary for this no-bake gig.
- Gentle with the Whipped Cream: When foldin’ the whipped cream into the Nutella mix, go slow and steady. If you’re too rough, you’ll deflate it, and your tart won’t set right in the fridge. Think of it like pettin’ a cat—nice and easy.
- Chill Time Ain’t Optional: Don’t skimp on the fridge time. Six hours minimum, folks. If you cut into it too soon, it’ll be more like pudding than tart. Patience pays off here.
- Room Temp Cream Cheese: Make sure your cream cheese is soft before mixin’. If it’s straight from the fridge, it’ll be lumpy, and nobody wants that. Leave it out for an hour or zap it in the microwave for 15 seconds if you’re in a rush.
Variations to Switch Up Your Nutella Cheese Tart
Now, if you’re like me and love playin’ around in the kitchen, there’s tons of ways to tweak this recipe. Here are some ideas to keep things fresh or match your vibe:
- Baked Hazelnut Crust: Wanna go a bit more gourmet? Swap the no-bake Oreo crust for a baked hazelnut one. Grind up some toasted hazelnuts with flour, sugar, and a pinch of salt in a food processor. Add cold butter till it’s crumbly, then mix in an egg and a splash of vanilla. Chill the dough, roll it out, and fit it into your tart pan. Bake it with pie weights (or dried beans if you’re cheap like me) at 350°F for about 20 minutes, then another 10 without weights till it’s golden. Let it cool before addin’ the fillin’. This gives a nutty crunch that pairs insane with Nutella.
- Different Fillin’ Flavors: Not feelin’ Nutella every time? Swap it for peanut butter, almond butter, or even cookie butter for a twist. Each one brings its own personality to the party. Just keep the ratios the same so it sets right.
- Chocolate Ganache Toppin’: For extra decadence, top your tart with a chocolate ganache. Melt some good chocolate with hot heavy cream, let it cool a bit, and spread it over the set fillin’. It’s like puttin’ a cherry on top, but way better.
- Mini Tarts for Cute Vibes: Instead of one big tart, make mini ones in a muffin tin. Same steps, just press the crust into each cup and fill ‘em up. They’re perfect for parties or portion control (if you can stop at one, ha!).
Ingredient Swaps for Everyone
We all got different needs or stuff in the pantry, so here’s how to switch things up if you’re missin’ somethin’ or got dietary quirks:
- Whipped Cream Substitute: If you ain’t got heavy cream or don’t wanna whip it, grab some store-bought whipped toppin’ like Cool Whip. It works in a pinch, though homemade tastes better.
- Crust Alternatives: Not into chocolate cookies? Use graham crackers, vanilla wafers, or even a pre-made crust from the store. If you’re gluten-free, pick your fave gluten-free cookies and crush ‘em up the same way.
- Dairy-Free Options: For a dairy-free twist, use vegan cream cheese and a dairy-free whipped cream alternative. Nutella itself is dairy-free, so that part’s covered. Check your cookie crust for milk ingredients if you’re strict about it.
- Butter Switch: If you don’t do butter, margarine or a plant-based spread can work for the crust. Just make sure it’s got a similar fat content so it holds together.
Serving and Storing Your Masterpiece
Once your Nutella cheese tart is ready, it’s time to show it off and keep it fresh for later (if there’s any left, that is). Here’s the deets:
- Serving Ideas: Slice it up and serve with a lil’ dollop of whipped cream on each piece. Sprinkle some chopped hazelnuts or chocolate shavings for that pro baker look. If you’re feelin’ extra, drizzle a bit of melted Nutella over the top. Pair it with coffee or hot cocoa for the ultimate cozy vibe.
- Storage Tips: Keep leftovers in an airtight container in the fridge. It’ll stay good for about 4 to 5 days, though I bet it won’t last that long. Don’t cover it with plastic wrap right away ‘cause it’ll stick to the pretty top—use a cake dome if you got one, or just wait till it’s fully set.
- Make-Ahead Magic: This tart is awesome for preppin’ ahead. Make it a day or two before your event and let it chill in the fridge. The flavors actually get better as it sits, so it’s a win-win.
Why I’m Obsessed with Nutella Cheese Tart
Lemme get personal for a sec. The first time I made this, it was for a family get-together, and I was nervous as heck. I ain’t no pastry chef, ya know? But when I pulled this tart outta the fridge and sliced it up, the room went quiet for a hot minute before everyone started ravin’. My cousin even asked if I bought it from a bakery! That creamy, chocolatey fillin’ with the crunchy crust—it’s like a hug in dessert form. Now, it’s my go-to whenever I wanna impress without stressin’. I’ve messed around with it so many times, tryin’ different crusts and toppin’s, and it never lets me down.
There’s somethin’ special about combin’ Nutella with cream cheese. It’s like they were meant to be together, balancin’ each other out so it ain’t too sweet or too heavy. Plus, the no-bake version means I can whip it up even when my oven’s actin’ up or I’m just too lazy to deal with it. If you’ve got kids or friends who love gettin’ in the kitchen, this is a fun one to make together—crushing cookies and mixin’ stuff is basically playtime.
Extra Ideas to Make It Your Own
Wanna take this tart to the next level or just mess around with what you got at home? Here’s more inspo to keep ya experimentin’:
- Add Some Crunch: Mix in some chopped hazelnuts or crushed cookies right into the fillin’ for a bit of texture. It’ll give every bite a lil’ surprise.
- Fruit Pairings: Slice up some strawberries or bananas and lay ‘em on top before servin’. The freshness cuts through the richness and looks darn pretty too.
- Boozy Twist: If you’re makin’ this for grown-ups, add a teaspoon of hazelnut liqueur or coffee liqueur to the fillin’. It’s a subtle kick that makes it feel extra fancy.
- Seasonal Vibes: Around the holidays, sprinkle some crushed candy canes or cinnamon on top for a festive touch. It’s a small change but makes it feel like a whole new dessert.
Wrappin’ It Up
So, there ya have it—everything you need to know about makin’ a Nutella Cheese Tart that’ll have everyone callin’ you the dessert boss. Whether you stick with the no-bake route for simplicity or go all out with a baked hazelnut crust, this treat is guaranteed to steal the show. It’s easy enough for a weeknight indulgence but impressive enough for a special occasion. I’m tellin’ ya, once you try this combo of creamy cheese and chocolate-hazelnut goodness, there’s no goin’ back.
Got a twist on this recipe or a funny story from makin’ it? Drop a comment below—I’d love to hear how it went down in your kitchen. And if you’re as hooked as I am, share this with your dessert-lovin’ crew. Now, go get that Nutella jar and let’s make some magic happen!
Why this recipe works
- Extremely easy to make.
- Incredibly creamy and melt in your mouth delicious.
- Made with simple ingredients.
- Perfect to make when you need a dessert to impress.
- Perfect for Nutella and hazelnut lovers.
- The perfect dessert for any occasion.
- There is no baking involved.
- Comes together in under 30 minutes.
Before you start to make this recipe, measure and prepare your ingredients so the cooking process will go smoothly and easily.
Nutella- you will need 1 ½ cups of Nutella for this recipe. We like using Nutella for this recipe, but if you don’t like Nutella or are allergic to one of the ingredients, you can use any kind of chocolate hazelnut spread.
Hazelnuts- we use hazelnuts for both the crust and the toppings. We highly recommend toasting the hazelnuts before using them. Toasting the hazelnuts releases the amazing flavors they naturally have.
Heavy whipping cream- you will need two cups of heavy cream for the filling.
Graham crackers- you will need about 1 ½ cup of graham crackers . If you don’t have graham crackers , you can use tea biscuits, vanilla wafers, and digestive biscuits.
Granulated sugar– we like to use granulated sugar, also the most common sugar used in baking. Caster sugar will work great as well.
Melted butter– melt the butter in the microwave for 30 seconds pulses, to make sure that the butter doesn’t boil up and explode in the microwave (been there done that), or melt it on the stovetop.
Vanilla extract– Vanilla extract Is an essential ingredient for baking, it adds extra flavor.
Salt– We used kosher salt for this recipe. Salt doesn’t give the filling a salty taste, it helps to enhance the chocolate flavor.
Cornstarch- you will need 2 tablespoon of cornstarch for the filling. The cornstarch thickens the filling.
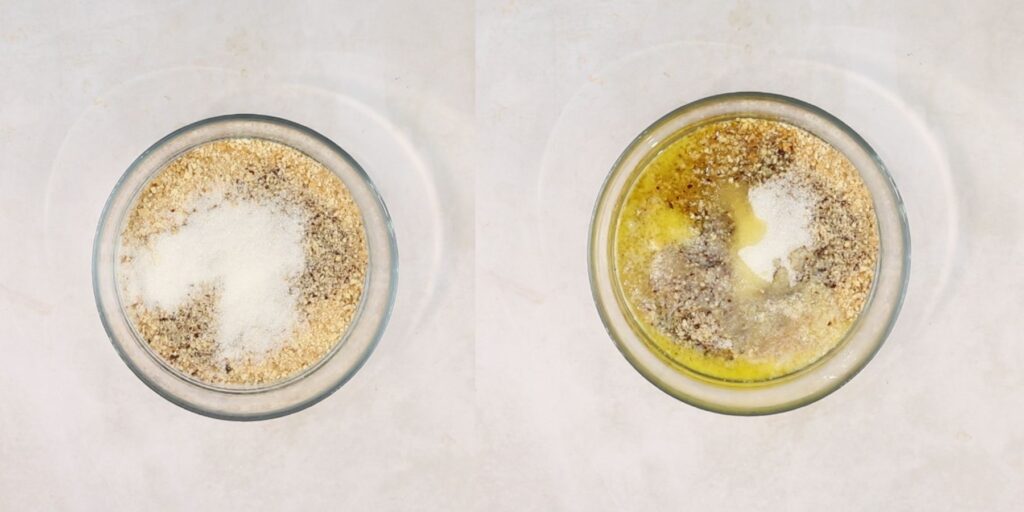
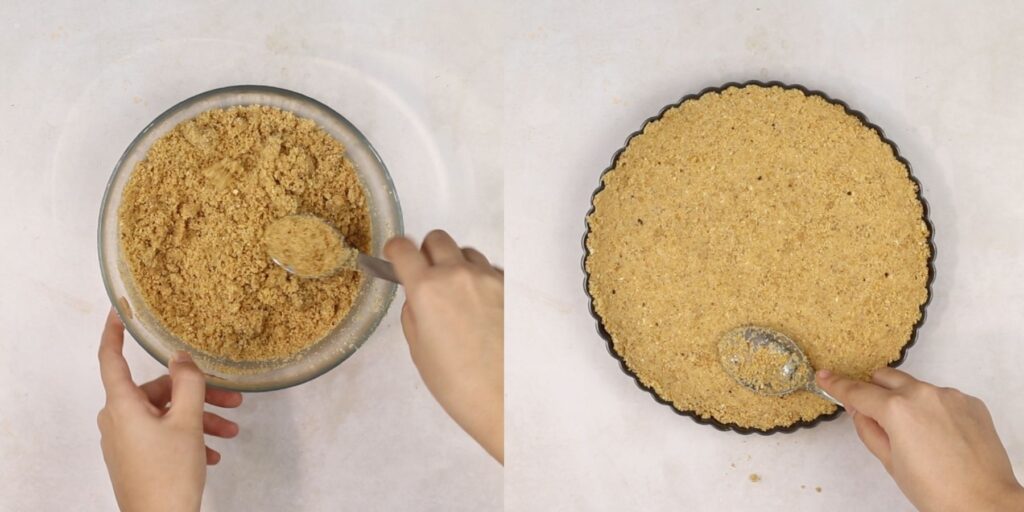
Start by making the hazelnut tart crust. In a big mixing bowl, add the graham cracker crumbs, hazelnut crumbs, granulated sugar, and melted butter. Mix with a spoon until the mixture is well combined.
Transfer the crust mixture to a tart pan, and press it into the pan until a nice even layer of crust forms. You will need a 9-inch tart pan, we highly recommend this tart pan, its a high-quality pan that is also affordable!
Carefully place the crust into the freezer to firm up for about 20 minutes.
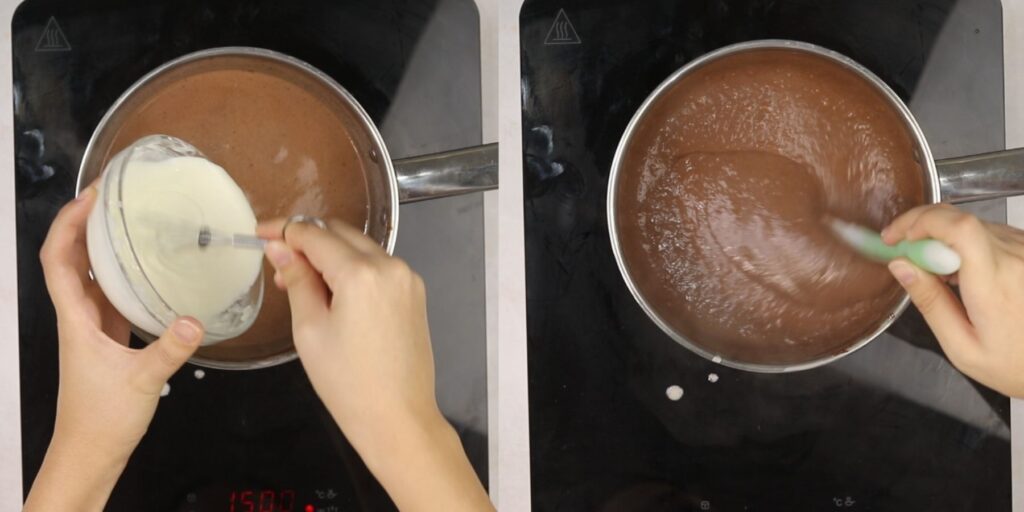
To make the filling, start by whisking the cornstarch and ½ cup of heavy cream in a small bowl. This step helps to avoid lumps in the filling.
Into a medium saucepan, add the heavy cream, vanilla extract, Nutella, and kosher salt. Cook over medium heat, whisking constantly until the mixture is well combined.
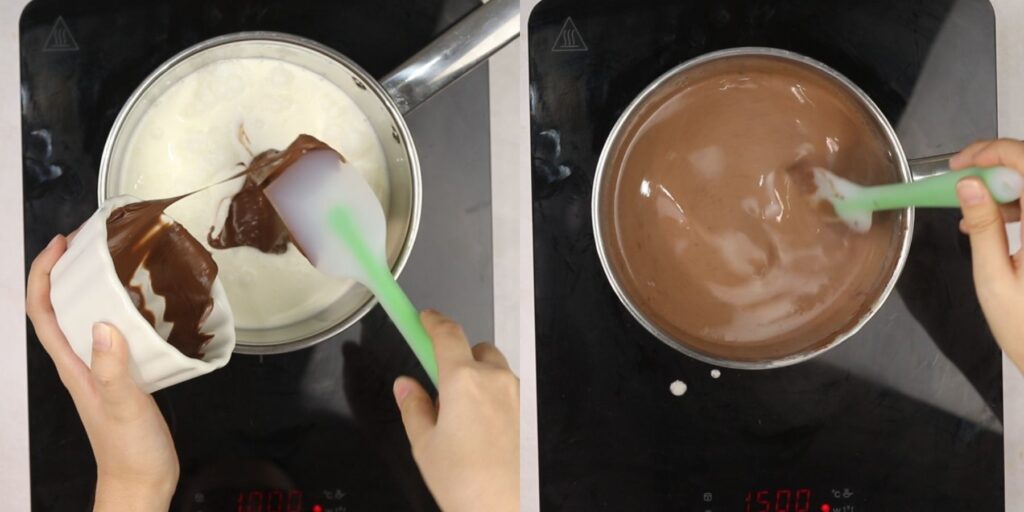
Add the cornstarch and cream mixture, mixing constantly, to avoid lumps in the filling. Let the mixture thicken up for 2-3 minutes. Remove from heat and keep stirring for 2 more minutes.
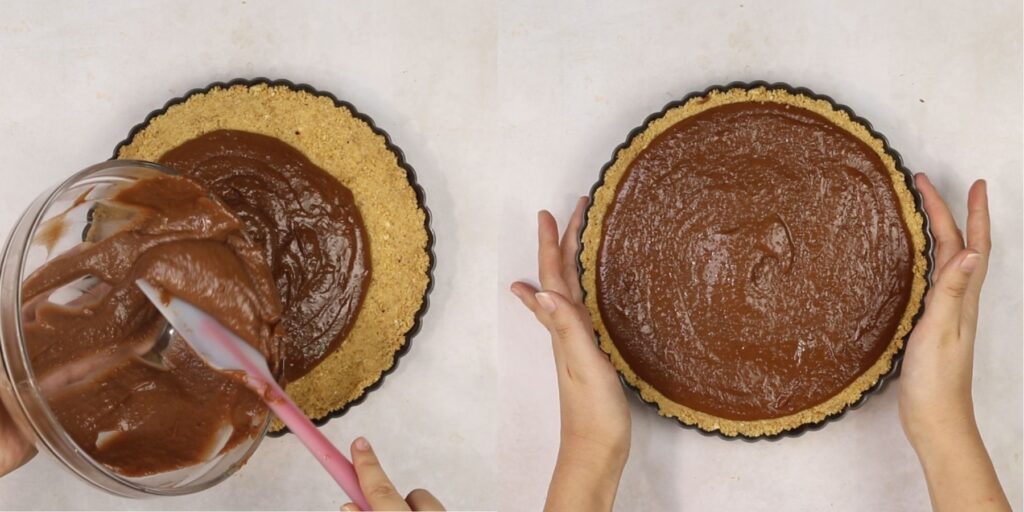
Remove the crust from the freezer and pour the filling into the crust. Smooth it out with a spatula until you are satisfied with the look of the tart. Chill the tart in the fridge for at least 3 hours to let it firm nicely.
Remove the tart from the fridge and carefully remove it from the tart pan.
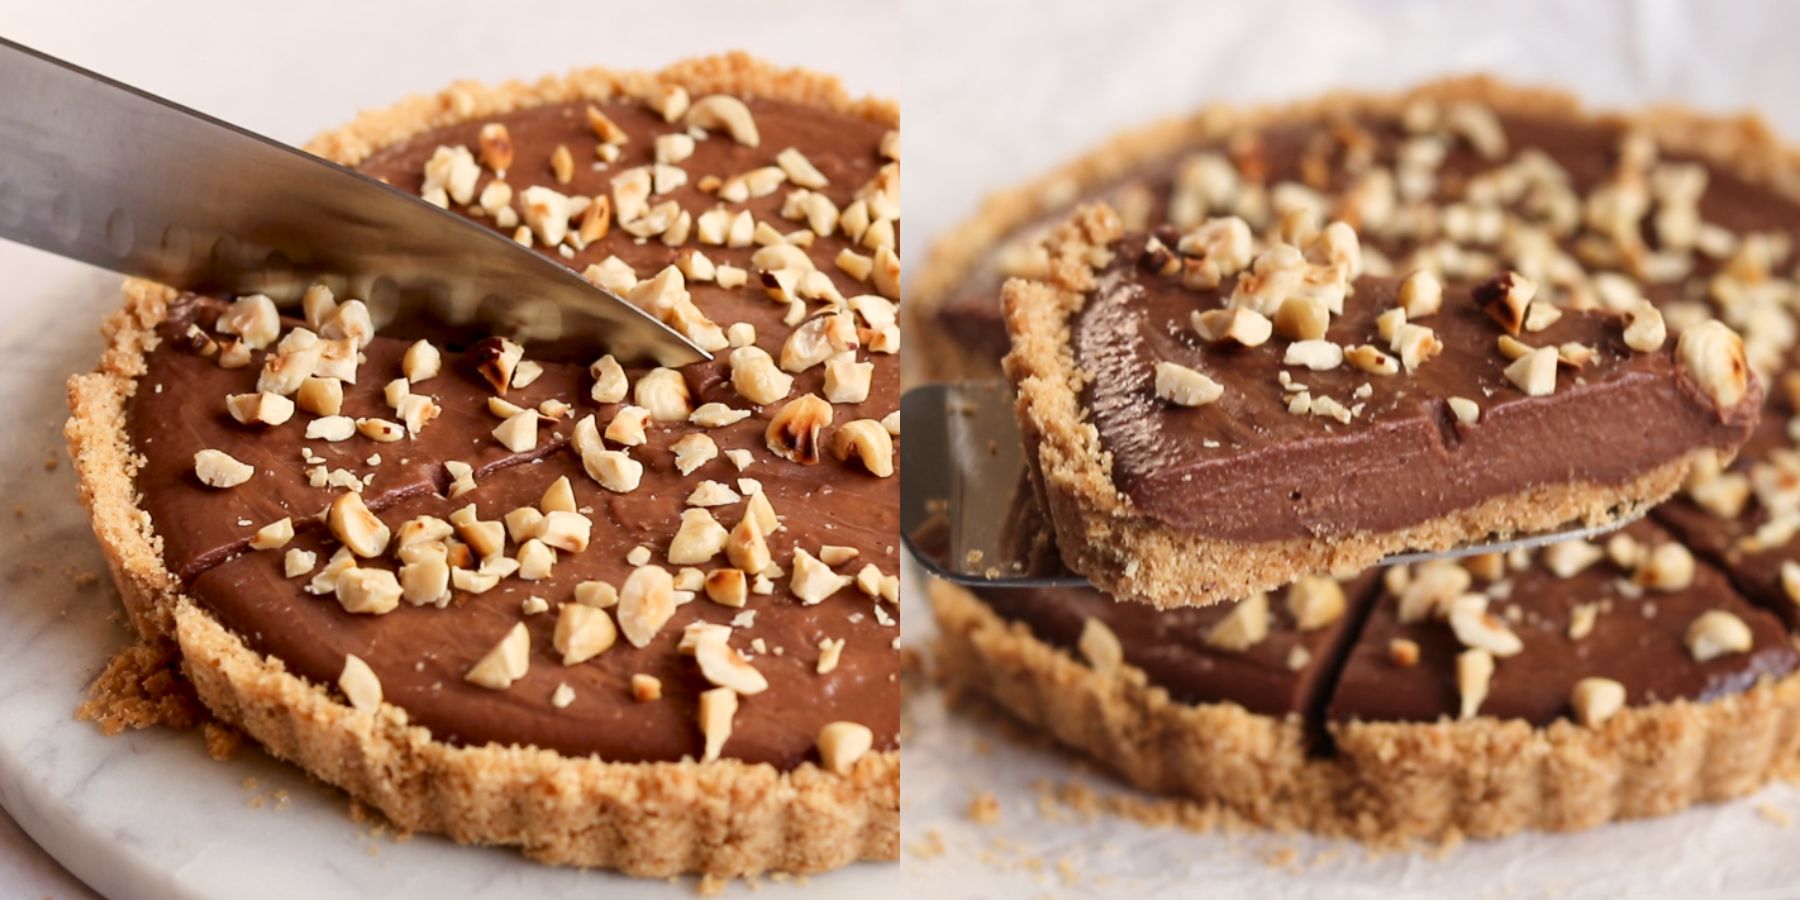
For decoration, we like to top the tart with chopped toasted hazelnuts. This step also gives the tart a beautiful look, and it gives it an extra crunch that everyone enjoys. Slice and enjoy!
- Use an easy-release tart pan. We use an easy-release tart pan for all of our tart recipes. This makes sure that your tart will be easy to release from the pan.
- To get even and clean tart slices, make sure that you are using a serrated knife. Our favorite way to cut tarts and cakes is by dipping a long knife into hot water, once the knife warms up, wipe off the excess water, and slice the tart. Dip and wipe the knife between every slice.
- Let your tart set in the fridge for at least 4 hours. We know it’s very hard to resist eating this delicious tart right away, but you have to let the filling stabilize in the pan.
- We highly recommend toasting the hazelnuts before using them in this tart. Toasting the hazelnuts releases the amazing flavors they naturally have.
- We like using classic Nutella spread for this tart recipe, but if you don’t have Nutella spread in your area, or are allergic to one of the ingredients, you can use any kind of chocolate hazelnut spread except for a natural one. Natural chocolate hazelnut spread can be loose and wont hold the shape of the tart.
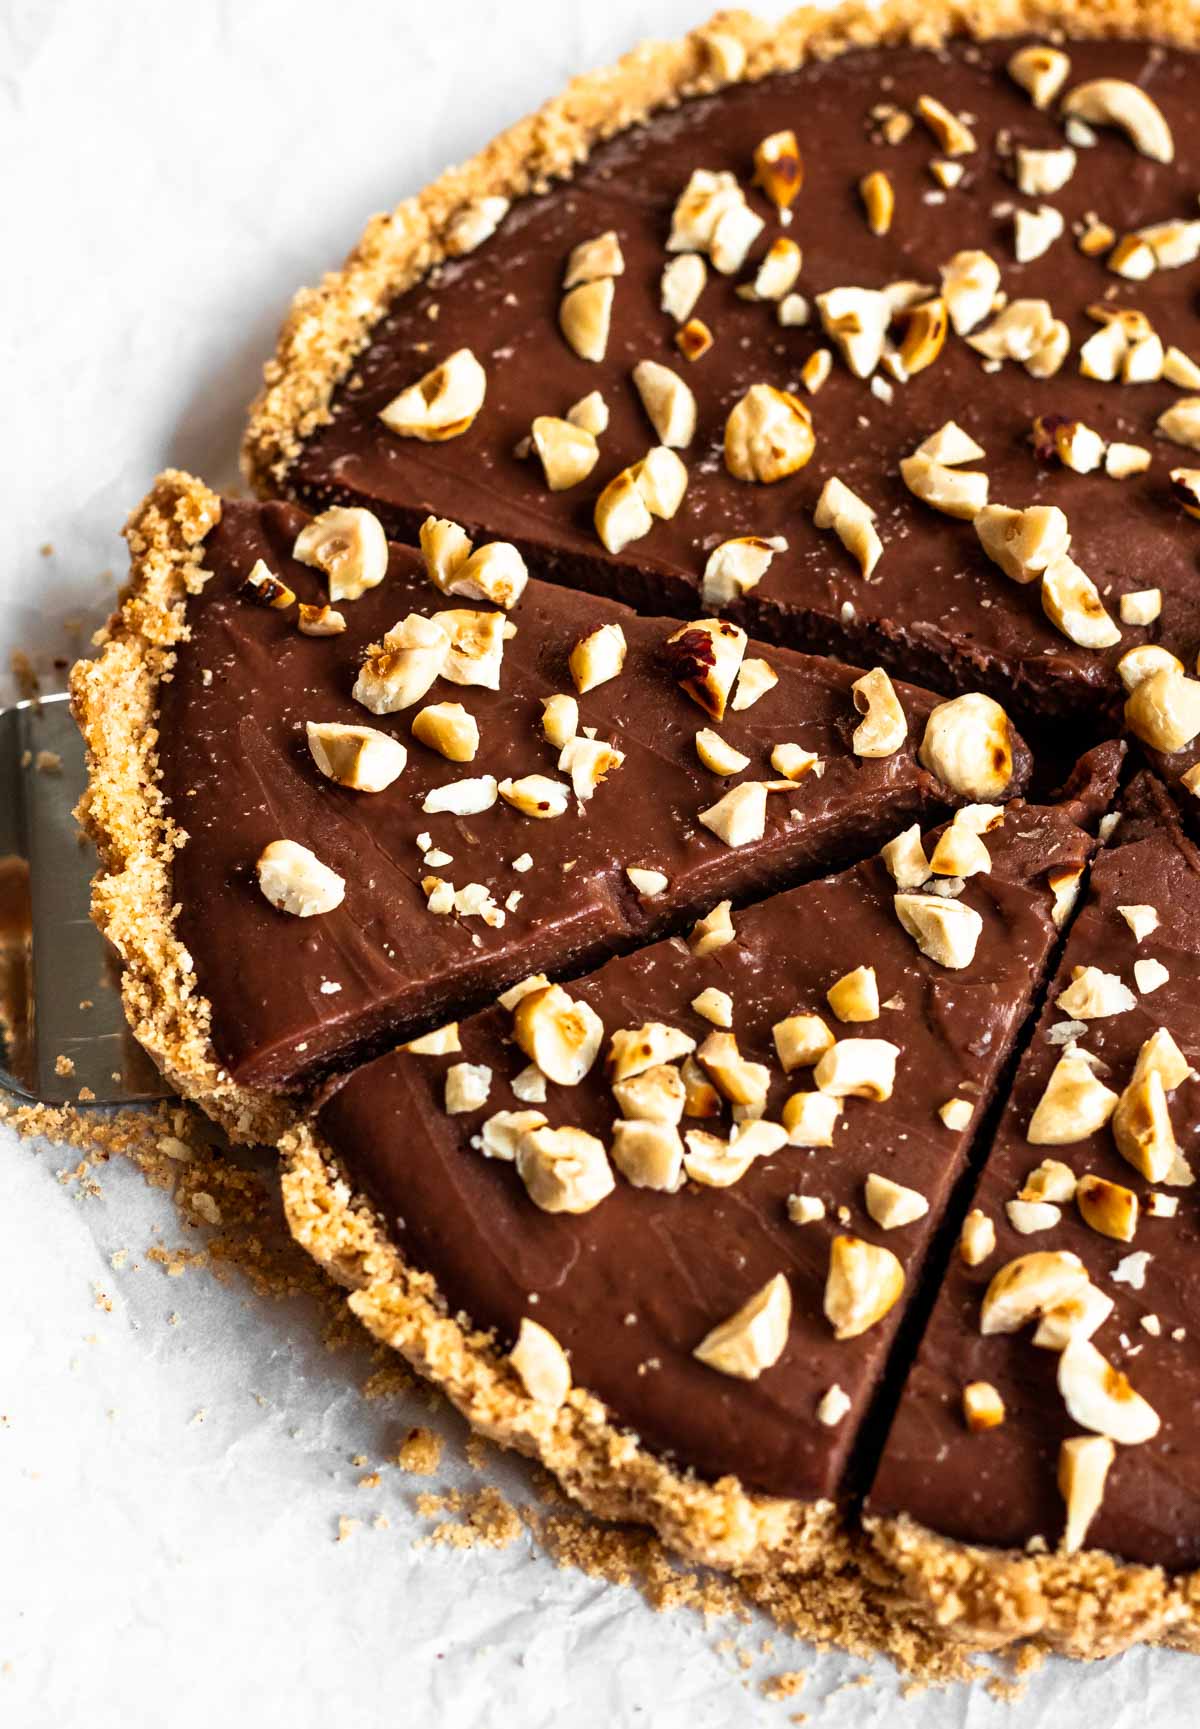
Cutting tart, the right way is very important. To get even and clean tart slices, make sure that you are using a serrated knife. Our favorite way to cut tarts and cakes is by dipping a long knife into hot water, once the knife warms up, wipe off the excess water, and slice the tart. Dip and wipe the knife between every slice.
This tart will last for up to 4 days stored in the fridge in an airtight container, or in the freezer for up to a month stored in an airtight freezer-friendly container.
Serve this tart by itself! As a dessert on a hot summer day, this tart is for Nutella and hazelnut lovers!
To freeze this tart, make it according to the instructions, then chill it according to the instructions in the fridge.
When the tart is completely set, you can freeze it covered in a few layers of plastic wrap or foil. This tart will freeze for up to 2 months. To thaw, place the tart in the fridge overnight.
Gluten-free – if you want to make this recipe gluten-free, simply replace the graham crackers with gluten-free graham crackers.
Dairy-free- you can make this tart dairy-free by replacing the heavy cream with coconut milk or vegan heavy cream, the Nutella with vegan hazelnut spread, and the butter with vegan butter.
Hazelnut spread- We like using classic Nutella spread for this tart recipe, but if you don’t have Nutella spread in your area, or are allergic to one of the ingredients, you can use any kind of chocolate hazelnut spread.
You can make this tart your own by adding different flavors to it.
Chocolate- If you like a rich chocolate flavor in your tart, add 50 grams of melted dark chocolate into the tart batter and follow the rest of the instructions.
Add-ins- you can add your favorite add-ins to the tart filling like m&ms, caramel bits, white chocolate chips, pretzels, chopped nuts, etc.
I like to decorate this tart by toasting and chopping hazelnuts and topping the tart with a nice amount on top. This step also gives the tart a beautiful look, and it gives it an extra crunch that everyone enjoys.
If you dont have extra hazelnuts for the top, you can also decorate this tart by piping dollops of whipped cream around the edges of the tart and top each whipped cream dollop with Nutella drizzle.
This tart is no-bake and needs to be stored in the fridge, so its perfect when you want an easy recipe that can sit in the fridge for a few days, and serve when needed!
One of our favorite things about this recipe is that you dont need an oven to make it, so if youre making it in the holiday season and need to use the oven, this dessert frees your oven for other cooking or baking recipes!
No-bake Nutella cheesecake- This no-bake Nutella cheesecake is rich in Nutella flavor, creamy silky smooth with a texture that is melt in your mouth delicious.
Nutella mug cake- This Nutella mug cake is gooey, rich, chocolaty, soft, tender, and dreamy. When you’re in the mood for a decadent dessert, this easy Nutella mug cake comes in handy.
Nutella cake- This incredible Nutella cake is made by making three chocolate Nutella cake layers, and Nutella buttercream, and topped with chocolate ganache.
If you tried this recipe, don’t forget to leave a rating and a comment below. We love hearing from you.
No Bake Nutella Cheese Tart || No Bake Tart || Cheese Tart || No Bake Dessert Recipe || Dessert
0