
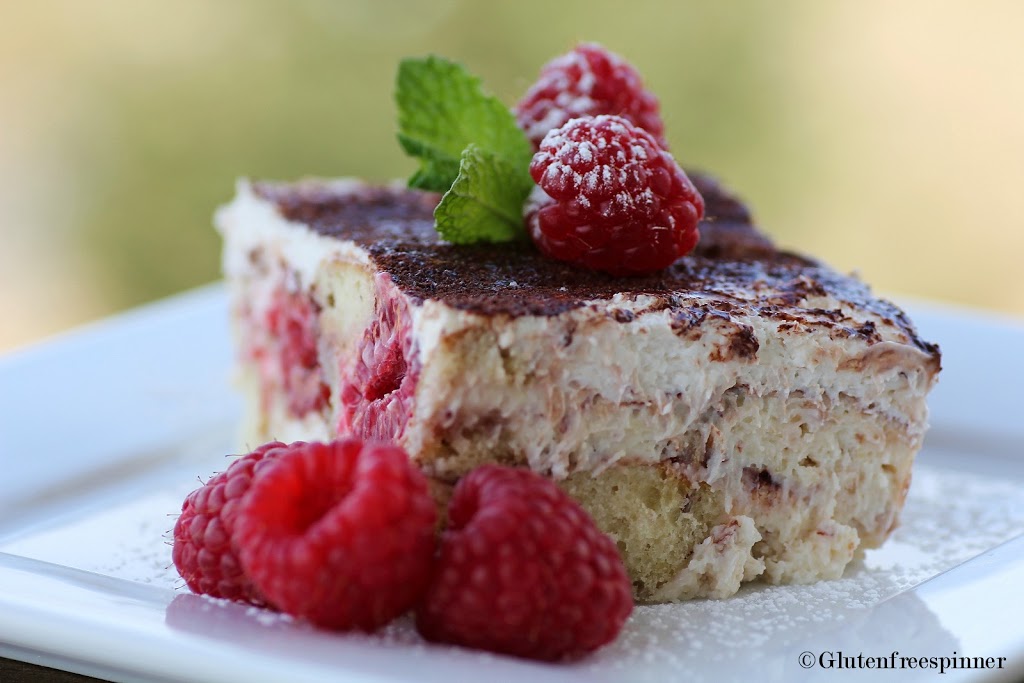
This gluten-free tiramisu is my favorite Italian dessert in a gluten-free version! Layers of fluffy coffee-infused cake intertwined with a rich creamy filling make a wonderful sweet treat for all coffee lovers, and it’s perfect for a special occasion such as Christmas, New Year’s or Easter! Totally dairy-free too!
Hey there dessert lovers! If you’ve been craving that iconic Italian pick-me-up but thought gluten was gonna stand in your way I’ve got some killer news for ya. Gluten-free tiramisu is here to save the day, and lemme tell ya, it’s just as dreamy, creamy, and coffee-drenched as the original. I’m talkin’ layers of espresso-soaked gluten-free ladyfingers, silky mascarpone magic, and a dusting of cocoa that’ll make your taste buds do a happy dance. Whether you’re dodging gluten for health reasons or just wanna try somethin’ new, this dessert is your ticket to indulgence without compromise. So, grab a spoon (or just dive in face-first, I ain’t judgin’), and let’s get into how we can whip this up at home!
What Even Is Gluten-Free Tiramisu?
Before we get our hands dirty in the kitchen, let’s break down what makes gluten-free tiramisu so special. At its heart, tiramisu is a classic Italian dessert that literally means “pick me up”—and trust me, it does! It’s traditionally made with ladyfingers (those light, spongy biscuits) dipped in espresso, sometimes spiked with a lil’ booze, and layered with a rich mix of mascarpone cheese and whipped cream or eggs. Then, it’s topped with a sprinkle of cocoa powder for that perfect bitter-sweet finish.
Now, the gluten-free twist? It’s all about swappin’ out them regular ladyfingers for ones made without wheat. Gluten, for those who ain’t in the know, is a protein in wheat, barley, and rye that can mess with folks who got celiac disease or gluten sensitivity. So, by using gluten-free ladyfingers—either store-bought or homemade—we keep all the flavor and texture of the OG dessert while makin’ it safe for more peeps to enjoy. It’s like givin’ a big ol’ hug to everyone at the table, no one left out!
Why You Gotta Try Gluten-Free Tiramisu
I remember the first time I had to skip tiramisu at a family dinner ‘cause of gluten concerns—it sucked big time. But then I figured out how to make it gluten-free, and let me tell ya it’s been a game-changer. Here’s why you should jump on this bandwagon, whether you’re gluten-free or not
- Inclusive Vibes: You can serve this at parties and not worry ‘bout anyone missin’ out. It’s a crowd-pleaser for all.
- Same Damn Taste: Done right, you won’t even notice the difference. The coffee punch, the creamy layers—it’s all there.
- Feel-Good Factor: Knowin’ you’re enjoyin’ a treat without triggerin’ health issues? That’s a win in my book.
- Braggin’ Rights: Whip this up, and folks will think you’re some kinda dessert wizard. Trust me, I’ve gotten those looks!
Ingredients: What You’ll Need to Make This Magic Happen
Alright let’s chat about what goes into makin’ a bangin’ gluten-free tiramisu. It ain’t a long list, but each piece plays a big role. I’ve learned through trial and error (and a few curdled messes oops) to stick to quality stuff here. Here’s the lineup for a dish that serves about 9-12 peeps, dependin’ on how greedy y’all are
| Ingredient | Amount | Notes |
|---|---|---|
| Gluten-Free Ladyfingers | 24-30 pieces | Homemade or store-bought. These are the base, so don’t skimp on quality! |
| Espresso or Strong Coffee | 1-1.5 cups | Freshly brewed and cooled. It’s gotta pack a punch for that tiramisu vibe. |
| Mascarpone Cheese | 16-20 oz | The creamy star. Keep it cold for best results. No subs if you can help it! |
| Egg Yolks | 4-6 large | For that rich custard feel. Use fresh or pasteurized if raw eggs scare ya. |
| Sugar | ½ – 1.5 cups | Granulated or superfine, split for eggs if whippin’ whites too. |
| Heavy Whipping Cream | ¾ – 1 cup (optional) | Some recipes use this for extra lightness. Keep it cold! |
| Egg Whites (optional) | 2-3 large | For authentic recipes, whipped to stiff peaks. Skip if usin’ cream. |
| Coffee Liqueur (like Kahlúa) | 2-3 tbsp (optional) | Adds depth to the coffee soak. Skip for kid-friendly or alcohol-free. |
| Cocoa Powder | 2-3 tbsp | For dustin’ on top. Go for unsweetened, Dutch-processed if ya got it. |
| Vanilla Extract (optional) | 1-2 tsp | For a lil’ warmth in the cream mix. |
| Salt (optional) | Pinch | Just a tiny bit to balance sweetness in some recipes. |
Quick Tip: If raw eggs ain’t your jam, you can gently heat the yolks with sugar over a double boiler till the sugar dissolves, or use pasteurized eggs. Safety first, folks!
Where to Get Gluten-Free Ladyfingers
This is where some folks trip up, so lemme give ya the lowdown. Gluten-free ladyfingers can be a pain to find in stores sometimes, but they’re out there if ya look. Check specialty food shops or the gluten-free aisle at bigger supermarkets. Brands like Schar make decent ones, though they might cost ya a pretty penny. Online’s also a solid bet if you’re stuck.
Or, if you’re feelin’ adventurous (like I often am), make ‘em yourself! It’s not as hard as it sounds—just eggs, sugar, and a gluten-free flour blend with some starch in it. Pipe ‘em into finger shapes, bake till light and spongy, and you’re golden. I’ve burned a batch or two learnin’ this, but when you get it right, oh man, it’s worth it!
Step-by-Step: How to Make Gluten-Free Tiramisu Like a Pro
Now, let’s get to the fun part—actually makin’ this bad boy. I’m gonna walk ya through it step by step, based on how I’ve done it after plenty of kitchen disasters. We’re aimin’ for a 9×9 or 8×8 dish, but you can tweak sizes as needed. Takes about 30-45 minutes to prep, plus chillin’ time. Let’s roll!
Step 1: Prep Your Coffee Soak
- Brew up that espresso or super-strong coffee—about a cup or so. Let it cool completely, even pop it in the fridge. Hot coffee will turn your ladyfingers to mush faster than you can say “oops.”
- If you’re usin’ liqueur like Kahlúa, mix in a couple tablespoons now. Skip this if you’re keepin’ it booze-free.
Step 2: Whip Up the Creamy Goodness
- If you’re usin’ raw eggs, separate 4-6 yolks into a bowl. (Got pasteurized? Even better!) Toss in about half a cup of sugar and whisk over a double boiler for 6-7 minutes till it’s pale and the sugar’s gone. No double boiler? Just use a heatproof bowl over a pot of simmerin’ water, don’t let it touch the water though.
- Let that cool a bit. Meanwhile, in another bowl, beat your mascarpone (16 oz or so) till smooth. Add the cooled egg mix and whip till fluffy, ‘bout 1-2 minutes.
- If usin’ heavy cream (¾ cup), whip it separate to stiff peaks, then fold into the mascarpone mix gently. Don’t overdo it, or it’ll get grainy. (Learned that the hard way!)
- Some folks whip egg whites instead of cream for authenticity. If you’re goin’ that route, beat 2-3 whites to stiff peaks with a bit of sugar, then fold ‘em in. Keep it airy!
Step 3: Assemble Like a Boss
- Grab your dish (8×8 or 9×9 works great). Quickly dip each gluten-free ladyfinger into the coffee mix—don’t soak, just a fast in-and-out on both sides. Lay ‘em in a single layer at the bottom. Cut some to fit if ya gotta.
- Spread half your mascarpone mix over the ladyfingers, smooth it out nice.
- Repeat with another layer of dipped ladyfingers, then top with the rest of the mascarpone mix. Smooth that top layer like you mean it.
Step 4: Finish and Chill
- Grab a sieve and dust the top with cocoa powder—be generous, it’s the cherry on top (or, well, the cocoa on top)!
- Cover with plastic wrap and chuck it in the fridge for at least 4-8 hours, or overnight if ya can wait that long. This sets everything so it don’t fall apart when you cut it.
Step 5: Serve and Slay
- Slice into squares, serve cold, and watch everyone’s jaw drop. Pair it with a shot of espresso if you’re feelin’ fancy. Trust me, it’s a vibe.
Tips and Tricks to Nail Your Gluten-Free Tiramisu
I’ve messed up enough times to know what works and what don’t, so here’s some hard-earned wisdom to keep ya from makin’ the same dumb mistakes I did:
- Don’t Soak Them Ladyfingers: Seriously, a quick dip is all ya need. Leave ‘em in too long, and you got soggy soup instead of dessert. I’ve ruined a whole tray like that, ugh.
- Chill Your Tools: If you’re whippin’ cream or eggs, stick your bowl and beaters in the fridge first. Cold gear makes it whip faster and hold shape better. Game-changer!
- Don’t Skimp on Chill Time: I know it’s temptin’ to dig in early, but 4 hours minimum in the fridge is non-negotiable. It needs to set, or it’s a gloopy mess.
- Raw Egg Worries? If raw eggs freak ya out, gently heat the yolks with sugar as I mentioned, or buy pasteurized ones. No shame in playin’ it safe.
- Mascarpone Matters: Don’t swap it for cream cheese if ya can help it. The texture and taste just ain’t the same. I tried once, and it was a sad day.
Storin’ and Freezin’ Your Tiramisu
Got leftovers? (Yeah, right, but just in case!) Here’s how to keep ‘em good:
- Fridge: Cover tightly with plastic wrap or pop into an airtight container. It’ll stay tasty for 2-4 days in the fridge.
- Freezer: Wanna save it longer? Wrap the whole dish tight in plastic wrap and foil, then freeze for up to 3 months. Thaw it in the fridge overnight before eatin’, and finish within a couple days after that. Texture might be a tad off, but still yummy.
- Heads-Up: Some purists say freezin’ ain’t ideal ‘cause of the cream, but I’ve done it in a pinch and lived to tell the tale.
Variations to Mix Things Up
Once you got the basic gluten-free tiramisu down, why not get a lil’ wild? Here’s some ideas I’ve played with or heard ‘bout:
- Booze-Free Bliss: Skip the liqueur altogether for a kid-friendly version. The coffee still shines.
- Different Liqueur: Not into Kahlúa? Try rum, amaretto, or even a splash of Marsala wine for a traditional Italian kick.
- Chocolate Twist: Sprinkle some finely grated dark chocolate between layers for extra decadence. I’ve done this for chocoholics, and they flipped!
- Fruit Vibes: Heard of folks addin’ a layer of crushed berries or jam for a fruity spin. Ain’t traditional, but sounds delish if ya wanna experiment.
Troubleshootin’ Common Hiccups
Even with the best plans, stuff can go sideways. Here’s how to fix some oopsies I’ve run into:
- Ladyfingers Too Soggy: If they’re fallin’ apart, you soaked ‘em too long. Next time, dip faster. For now, just layer ‘em anyway; it’ll still taste good, just messier.
- Cream Mix Curdled: Overmixed or got the mascarpone too warm? Start over if ya can, or just smooth it out best as possible—it won’t be perfect but still edible.
- Not Settin’ Right: Didn’t chill long enough? Back in the fridge it goes. Give it a few more hours to firm up.
Why Gluten-Free Tiramisu Feels Like a Hug
Lemme get a bit sappy for a sec. There’s somethin’ ‘bout tiramisu that just lifts ya up, ya know? Maybe it’s the name, maybe it’s the caffeine buzz from the espresso, or maybe it’s just the pure joy of diggin’ into somethin’ so rich and creamy. But makin’ it gluten-free? That’s next-level love. It’s like tellin’ yourself or someone ya care ‘bout, “Hey, you don’t gotta miss out on the good stuff.” I’ve made this for friends who thought they’d never taste tiramisu again, and seein’ their faces light up—man, that’s why I keep messin’ around in the kitchen.
Pairin’ and Servin’ Ideas
When I serve up gluten-free tiramisu, I like to keep it simple but classy. Here’s a couple ways to make it pop at your table:
- Espresso on the Side: A tiny shot of espresso or a small coffee pairs perfect. It doubles down on that coffee kick.
- Party Ready: Cut into neat squares and plate with a lil’ extra cocoa dusted on for looks. Looks pro without much effort.
- Holiday Star: This is my go-to for holiday dinners ‘cause it don’t need oven space, travels easy, and impresses everyone.
Final Thoughts: Get in the Kitchen, Y’all!
So, there ya have it—everything ya need to know ‘bout makin’ gluten-free tiramisu that’ll knock yer socks off. It ain’t just a dessert; it’s a way to bring folks together, to show that food restrictions don’t mean givin’ up on flavor or fun. I’ve spilled all my secrets, from the must-have ingredients to the lil’ tricks that make it work. Now, it’s your turn to roll up them sleeves and give it a shot. Got questions or wanna share how it turned out? Drop a comment—I’m all ears! Let’s keep this dessert party goin’, and remember, life’s too short to skip on tiramisu, gluten or no gluten. Dig in and enjoy, fam!
1 Dissolve Sugar in Coffee
Mix the sugar into the hot coffee.
Why This Recipe Works
- Simple Ingredients: The ingredients needed for making this gluten-free tiramisu cake are easily accessible from the local grocery stores (or you can get them easily online).
- Easy to Make: While the assembling of the tiramisu may take a while, bringing this cake together is really easier than it seems!
- Perfect for Dinner Party: Because this recipe makes tiramisu in individual portions, it’s the perfect dessert for preparing beforehand and serving after dinner!
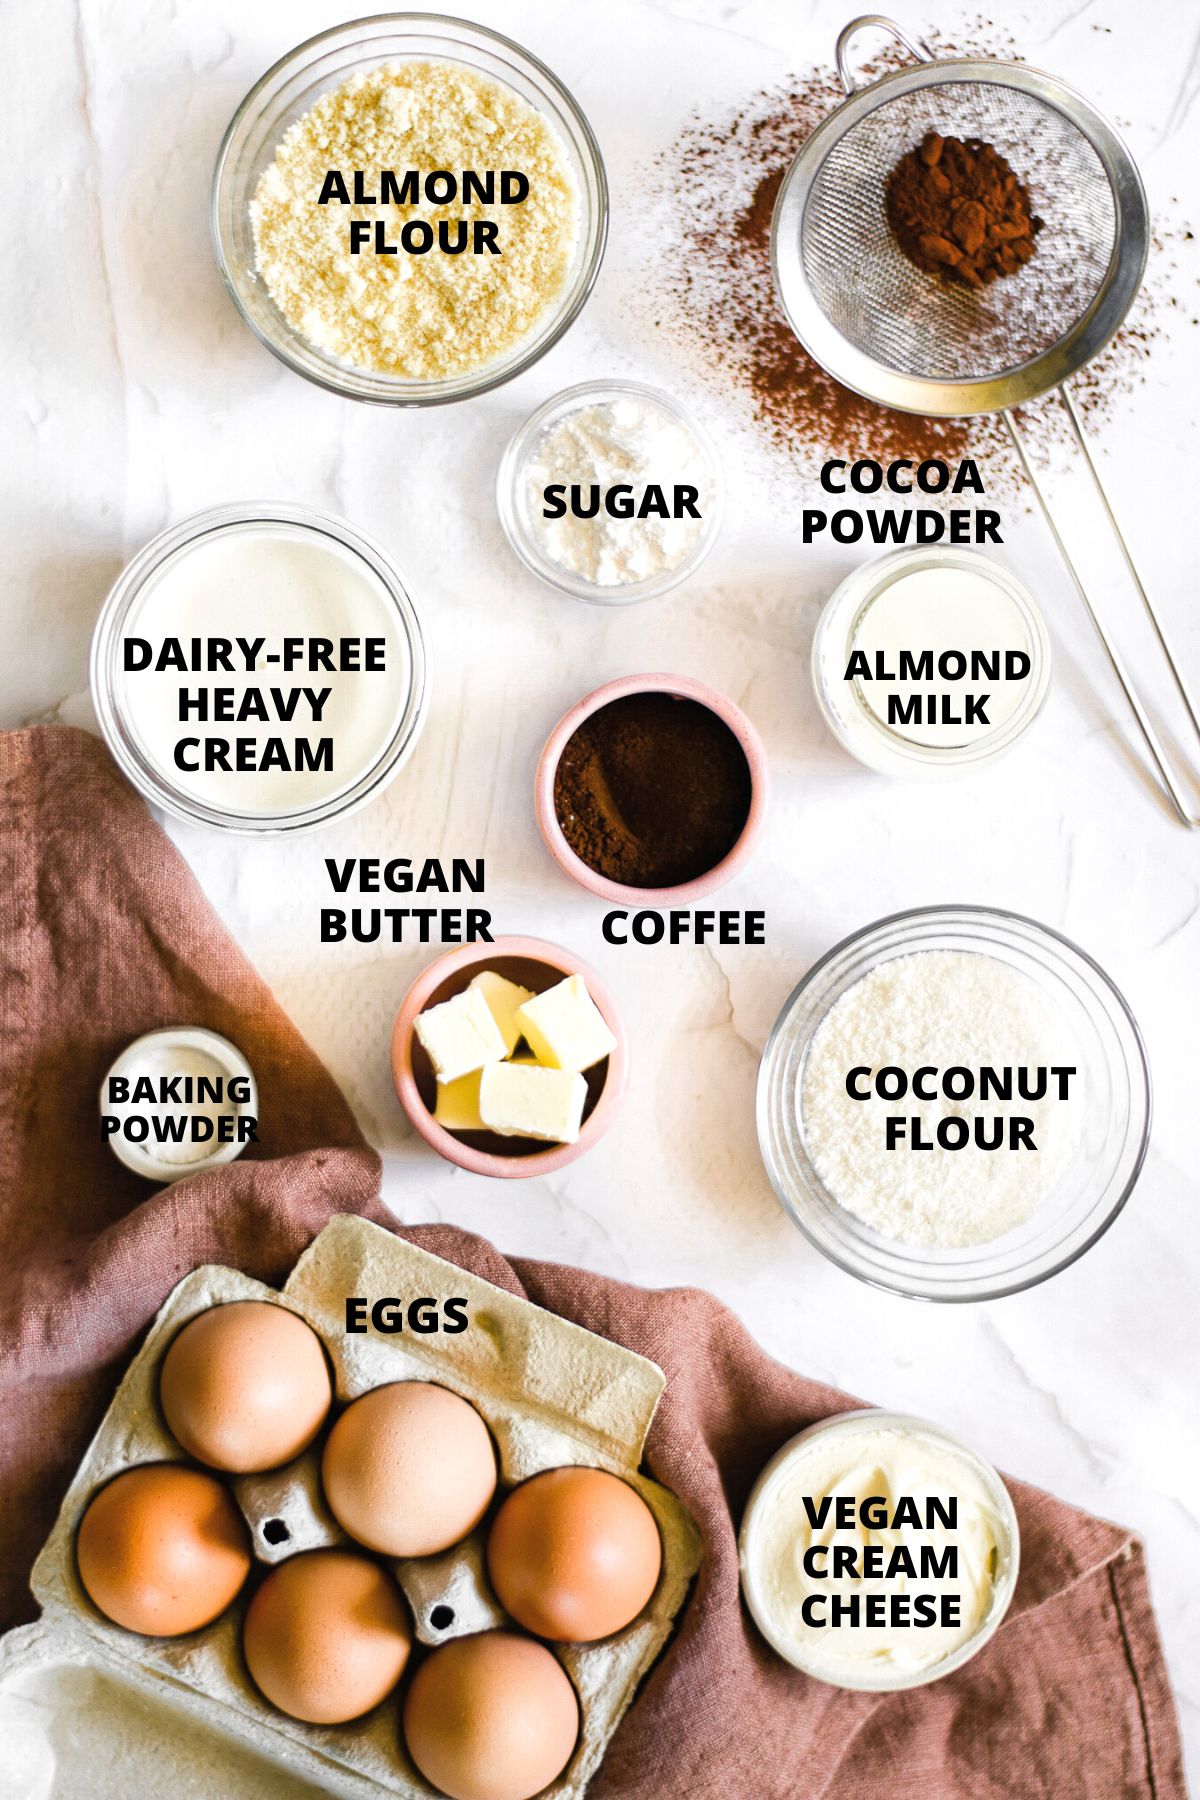
- Totally Gluten-Free and Dairy-Free: The good news is that this tiramisu dessert recipe is 100% gluten-free and dairy-free (we’re making our own gluten-free sponge cake to substitute traditional wheat ladyfingers, plus we’re using vegan cream cheese and dairy-free heavy cream in place of mascarpone cheese). This means that even those with Celiac disease or gluten or lactose intolerances can enjoy this dessert recipe!
Here’s a visual overview of the ingredients required to make this gluten-free tiramisu recipe.
(For exact measurements, please scroll down to the printable recipe card at the bottom of this post!)
Gluten Free Classic Tiramisu
FAQ
What can I use instead of ladyfingers for tiramisu gluten-free?
It is easy to make a tiramisu without ladyfingers by using my Gluten-Free Sponge Cake since store-bought gluten-free ladyfingers are often hard to find. I used this delicious filling from a New York Times Tiramisu recipe I found. It is by far the best filling.
Can gluten-free people eat tiramisu?
☕TIRAMISU☕ A classic Italian desert, easily made #glutenfree using my ladyfingers/savoiardi recipe as the sponge finger base. These are soaked in coffee and (optional) coffee liquor, then layered with a rich vanilla mascarpone cream, before being dusted with cocoa.
Are gluten-free ladyfingers good for tiramisu?
Schar Ladyfingers are the only gluten free ladyfingers on the market, so make them yours today! FAVORITE: These delicious gluten free ladyfingers are imported from Italy and are perfect for snacking, but exceptional for tiramisu!
Are Costco tiramisu cups gluten-free?
Ingredients. If you can’t have alcohol in your diet, you need to skip these. Additionalky, they’re not gluten-free or dairy-free.