
The only surefire way to dry royal icing is simply time – letting royal icing cookies sit out at room temperature to fully harden. This typically takes a minimum of 6-8 hours. Though there is no substitute for time, there are a few tips and tricks to help speed up the process.
Disclaimer: This post may contain affiliate links, meaning I may get a small commission if you decide to make a purchase through my links at no cost to you.
Hey there, fellow bakers! If you’ve ever been stuck waiting for royal icing to dry on your cookies, you know the struggle is real. Hours of just sittin’ there, watchin’ paint dry—well, icing, but you get the drift. I’ve been there, messed up a batch of holiday cookies ‘cause I got impatient and smudged ‘em all. Total disaster! But guess what? We at [Your Company Name] got your back with some killer tricks to dry royal icing fast, so you can get those beauties packaged or gobbled up in no time. Let’s dive right into the good stuff and cut the waitin’ game short!
What’s Royal Icing, and Why Does Drying Matter?
For those just jumpin’ into the baking world, royal icing is that magical white stuff made from powdered sugar and egg whites (or meringue powder if you’re playin’ it safe). It’s the go-to for decorating cookies, cakes, and gingerbread houses ‘cause it dries hard and looks super sleek. But here’s the kicker—it can take forever, like 6 to 8 hours at room temp, to fully set. Ain’t nobody got time for that when you’re on a deadline or just wanna show off your masterpieces ASAP.
Drying matters big time ‘cause until it’s hard, you risk smushin’ your designs One wrong move, and your cookie art’s a hot mess. Plus, if you’re stackin’ or packin’ ‘em for gifts, wet icing sticks and ruins everything Speedin’ up the process means less stress and more time to bake—or eat, no judgment here!
What Slows Down Royal Icing Drying? The Sneaky Culprits
Before we get to the fast-dry hacks, let’s chat about why your icing dries slower than a snail on vacation. Knowin’ these factors can help ya dodge the delays:
- Humidity: If you’re in a steamy, humid spot, good luck. Moist air keeps the icing tacky for ages, sometimes overnight and still not done. I’ve cried over sticky cookies in a muggy summer kitchen—true story.
- Icing Consistency: Thinner icing, like the flood stuff for coverin’ big areas, takes way longer than thick piping icing for details. More water equals more drying time.
- Temperature: Hot, stuffy rooms slow things down. Cooler, drier air is your friend for quick hardening.
- Fat or Oil in the Mix: If ya got grease or oil in your icing (maybe from a dirty mixer or oily extract), it might never dry. It’s like mixin’ water and oil—disaster!
- No Airflow: If your cookies are just sittin’ there with no breeze, the moisture can’t escape. Air circulation is key, fam.
Got a humid kitchen? Thin icing mix? You’re in for a long haul unless you tweak some stuff. Let’s get to the fixes now, so you ain’t waitin’ forever
How to Dry Royal Icing Fast: Top Tricks That Work
Alright here’s the meat of it—ways to speed up that drying so you’re not starin’ at wet cookies all day. I’ve tried these myself, messed up a few times and figured out what actually gets results. Let’s roll!
1. Blast It with a Fan—Cheap and Easy
Hands down, my fave way to hurry things up is grabbin’ a table fan. It’s cheap, most of us got one layin’ around, and it cuts drying time like a champ. Here’s how to do it:
- Set your decorated cookies on a flat tray or baking sheet.
- Point a small fan at ‘em, medium speed, from about 3 feet away. Too close or too strong, and you’ll blow the wet icing outta shape—learned that the hard way!
- Let the air circulate over ‘em. You’ll see a crust form in 30 minutes or so, and full drying can drop to 4-6 hours, sometimes less.
- Bonus: It often gives the icing a lil’ sheen, makin’ your cookies look pro.
Just don’t use a mega-powerful fan, or you’ll have cookies flyin’ off the counter. If you got a ceiling fan in the room, turn that on too for extra airflow. Simple, right?
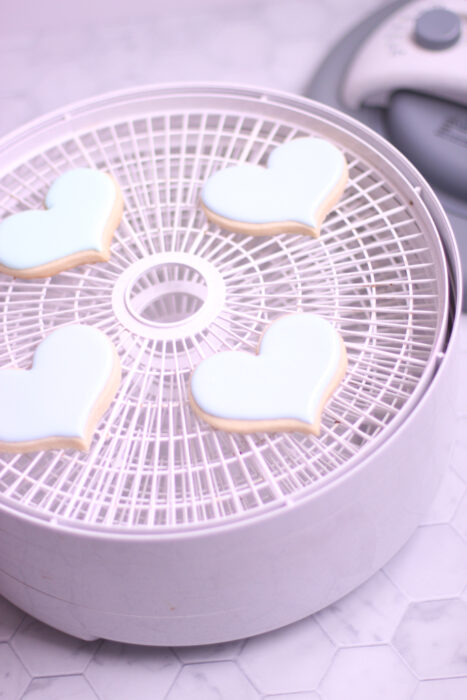
2. Use a Food Dehydrator—Next-Level Speed
If you’re serious about baking or got a dehydrator kickin’ around, this is your golden ticket. It sucks the moisture right outta the icing, and the built-in fan helps too. Here’s the deal:
- Place cookies on the dehydrator trays, single layer, no stackin’.
- Set it to the lowest temp—around 95°F if possible. Too hot, and you’ll dry out the cookie itself, makin’ it taste like cardboard.
- Check every 10-15 minutes. Don’t leave ‘em in too long; 60 minutes total is pushin’ it. I usually do short bursts after each icing layer.
- Watch out: Don’t use it for final details unless you’re sure they won’t crater. A quick 10-minute zap can prevent that, though.
This method’s faster than a fan, sometimes droppin’ drying to a couple hours for base layers. But, it can over-dry cookies if you ain’t careful, so set a timer. I forgot once and ended up with rock-hard bites—not fun.
3. Make Your Icing Thicker from the Get-Go
Prevention’s better than cure, yeah? If you mix your icing thicker, it dries quicker, period. Flood icing (the runny kind for big areas) takes forever, while piping icing (thicker for lines) sets fast. Here’s how to tweak it:
- When mixin’, add less water. Use a spray bottle to control it—few spritzes at a time. Aim for a 15-second consistency for flood icing (takes 15 seconds to settle flat when you drizzle it).
- Thicker icing spreads less but dries smoother and puffier, cuttin’ down wait time by hours.
- Takes practice to get the sweet spot for your climate, but once you nail it, you’re golden.
I used to go too thin and wait all day. Now, I keep it on the thicker side, and drying’s way faster. Test it out!
4. Oven Light Hack—Sneaky but Effective
Got no fan or dehydrator? Your oven might save the day, but don’t turn on the heat! Just use the light. Sounds weird, I know, but it works. Try this:
- Pop your cookie tray in the oven, middle rack for max airflow.
- Turn on just the oven light—no heat, or you’ll bake ‘em again.
- Close the door and let the lil’ warmth and enclosed space work magic. It’s subtle but speeds things up a notch, maybe to 5-6 hours.
Heads-up: Make sure your oven’s clean. Sugar sucks up smells, and I’ve had icing taste like last night’s lasagna—yuck! If your oven don’t got a light, skip this one.
5. Dehumidifier or AC for Humid Hell
If you’re bakin’ in a swampy kitchen, humidity’s your worst enemy. It can triple drying time, no joke. I’ve been there in a steamy summer with no relief. Fix it like this:
- Set up a dehumidifier in the same room as your cookies, cranked to high. It pulls moisture from the air, lettin’ icing harden faster.
- No dehumidifier? Use a window AC or cool air conditioning. Place cookies near the vent for a dry, cool breeze. Works wonders!
- This ain’t a standalone fix but paired with a fan, you’re lookin’ at serious time cuts.
I started usin’ an AC unit after a humid disaster, and my cookies went from tacky overnight to set in 5 hours. Game-changer if your place is a sauna.
Quick Comparison Table: Drying Methods at a Glance
| Method | Speed Boost | Cost | Risks | Best For |
|---|---|---|---|---|
| Table Fan | Medium (4-6 hrs) | Low | Can blow icing if too strong | Everyone, single-layer icing |
| Food Dehydrator | High (2-4 hrs) | Medium/High | Over-dries cookies if too long | Frequent bakers, multi-layers |
| Thicker Icing | Medium (varies) | Free | Tricky to perfect consistency | All skill levels |
| Oven Light | Low-Medium (5-6 hrs) | Free | Absorbs oven smells | No gear, small batches |
| Dehumidifier/AC | Medium (varies) | Medium/High | Needs equipment | Humid climates |
Pick what fits your setup. I usually mix a fan with thicker icing for max speed without spendin’ extra dough.
Mistakes to Avoid—Don’t Do What I Did!
Speedin’ up drying ain’t just about what to do; it’s also ‘bout dodgin’ dumb moves. I’ve flubbed these, so learn from my oopsies, alright?
- Don’t Use the Fridge: I thought, “Cold means fast, right?” Wrong! Fridges are humid and damp, stoppin’ icing from drying and makin’ colors bleed. It can even soften your cookies. Total fail. Keep ‘em at room temp instead.
- No Airtight Containers Too Soon: Trapin’ wet icing in a box or bag before it’s dry is a recipe for sticky chaos. Air needs to hit it, so wait ‘til it’s hard—usually 8 hours without help—before sealin’ ‘em up.
- Don’t Stack While Drying: Short on space? Tough luck, don’t stack trays. It traps humidity between cookies, slowin’ everything down. Lay ‘em out single-layer, even if it means takin’ over the dining table. I’ve ruined batches stackin’—never again.
- Avoid Fat in the Mix: If your mixer’s greasy or you used an oily extract, kiss drying goodbye. Wipe gear with vinegar or lemon juice before mixin’ to keep fat outta there. I skipped this once, and my icing stayed gooey for days, ugh.
Steer clear of these traps, and you won’t be cryin’ over messed-up cookies like I was back in the day.
Extra Tips for That Pro Finish
Wanna go beyond just fast drying and make your icing pop? Here’s a couple bonus tricks we swear by at [Your Company Name]:
- Add a Shiny Look: Want glossy, not matte, icing? Toss a tiny bit of corn syrup into your mix. Not too much, or it won’t harden right. Pair it with a fan right after decoratin’—the quicker the crust forms, the shinier it gets. My holiday cookies looked like glass after I started this!
- Test Dryness: Not sure if it’s set? Press with medium thumb pressure. If it don’t indent, you’re good. If it does, give it more time. I poke spots that’ll get covered by another layer, so no one sees my test marks.
- Storage Once Dry: Once hard, store in an airtight container to keep ‘em fresh. You can even freeze ‘em if they’re fully set—perfect for preppin’ ahead. Just don’t do it ‘til they’re 100% dry, or you’re back to square one.
Little tweaks like these make a big diff, trust me.
Wrappin’ It Up—Go Slay Those Cookies!
There ya have it, peeps—everything ya need to dry royal icing fast and get back to the fun part of baking. Whether you’re blastin’ with a fan, crankin’ a dehydrator, or just mixin’ thicker icing, you’ve got options to cut that 8-hour wait down to size. Dodge the rookie mistakes, like fridge-dryin’ or stackin’ too soon, and you’ll be golden. I’ve flopped enough times to know these hacks are lifesavers, and I’m pumped to see your cookie game level up with ‘em.
Got a crazy baking deadline? Or just hate waitin’? Try these out and lemme know how it goes. Drop a comment with your fave method or any wild tricks I missed. And hey, if you’re lovin’ these tips, share this post with your baker buds—we’re all about spreadin’ the cookie love at [Your Company Name]. Now go whip up some iced masterpieces and make ‘em dry faster than ever!

Common Royal Icing Drying Problems
If you find that your cookies are drying with small air bubbles throughout, there are a few easy ways to fix it. Air bubbles are often formed in the icing when you mix the dough on a high speed, too much air is incorporated into the icing and can lead to air bubbles when decorating. To try and avoid them, mix your icing on a lower speed when making.
When you find yourself with air bubbles use a toothpick or cookie scribe to poke them out. Alternatively, you can gently pick up your cookie and drop it flat onto your decorating surface. I would not recommend this method if you have a delicate cookie shape that is prone to decorating. However it can be an effective method for hearty shapes to get out many air bubbles at once.
Color bleed occurs when one color bleeds into the next as it dries. This typically happens with thin icing, when there is too much moisture in the icing, or if there is too much food coloring used.
One of the most common culprits is a darker or vibrant colors bleeding into a white (or light) base color. You can avoid this by actually dying your white icing white (while there are many brands, I often use Hobby Lobby brand with great results).
When using dark colors, allow the color to develop for at least 30 minutes (the color will continue to darken over the next 12 hours or so). Essentially if you achieve your target color as you are mixing, youve probably added too much food coloring. Also, dont make your icing too thin and placing your cookies with multiple colors directly in front of a fan will help lessen the chance for color bleed.
Lastly, make sure the base coat of your royal icing is dry to the touch before moving onto the next layer. I like to dry the first layer of icing completely before moving on to the details which helps me to avoid bleed. However, many cookie decorators operate with shorter time periods between layers with positive results.
Methods to Dry Royal Icing
Allowing royal icing decorations to sit at room temperature to dry is the best way to harden the icing. The minimum amount of drying time required is typically 6-8 hours. However, this time can be changed depending on several variables including the consistency of the icing, humidity, design, etc. The best way to get your royal icing to harden is to let it sit on parchment paper or wax paper for many hours, place it in front of a fan to increase air flow, or put it into a food dehydrator.
Royal Icing needs at least 6-8 hours of drying time to thoroughly harden so that it can be touched or moved without creating imperfections. After about 30 minutes to an hour, a thin crust will begin to form on the top of the royal icing. When this happens, it will begin to look like it is dry, but the icing underneath the top layer will not yet have hardened.
Once your cookies are decorated, place them on a cookie sheet lined with parchment paper or straight onto a wire rack or cookie sheet to dry.
Though the standard drying time for most people is about 6-8 hours, there are a few things that could alter that time. The icing consistency will be a large factor in this. The thicker the icing, the quicker it will dry. For flood consistency icing (thinner icing), you will need much more drying time.
Humidity will also have a huge impact on the perfect royal icing drying time. I’ll go more into depth on that later, but essentially, in higher humidity, you will need more drying time.

Using a fan to assist in drying royal icing is my favorite method. I use a small table fan to help circulate the air around the cookies. This will not only cut down on drying time but will also help the royal icing to dry with a bit of a sheen. The quicker that thin crust forms, the shinier the icing will be, and the better chance you will have to avoid craters.
Simply, allow the fan to blow cool air over the cookies on a baking sheet or drying rack. Just don’t use too powerful of a fan… you don’t want it to blow the wet icing around and mess up your designs or blow the cookies off of your drying surface!
If you have a ceiling fan in the drying room, it wont have a direct impact but any further air circulation in the room will be beneficial.

Food dehydrators are an excellent way to speed up the drying process. As in the name, they will ‘dehydrate’ the frosting by removing the moisture. There is also airflow in the dehydrator helping the royal icing to dry puffier and shinier.
Dehydrators are also great for getting the surface of the icing cookie to dry quickly, so there is less waiting time between your first and second layers of icing.
Don’t worry though, cookies have to be in the dehydrator for a LONG time to dry out the cookie itself. I have used my dehydrator occasionally for royal icing drying, but I am by no means an expert (nor do I have one of the best food dehydrators for this). However, I would highly recommend this post by Borderlands Bakery where she outlines the best dehydrators and more thorough information on using them for your cookies!
How To Dry Sugar Cookies In The Oven | Glossy Royal Icing
FAQ
How do you make royal icing dry faster?
Food Dehydrator
Food dehydrators are an excellent way to speed up the drying process. As in the name, they will ‘dehydrate’ the frosting by removing the moisture. There is also airflow in the dehydrator helping the royal icing to dry puffier and shinier.
How to dry out icing quickly?
- Use a hard, flat surface. Choose a hard, flat surface for your fondant to dry on. …
- Make your fondant thin. When rolling out your fondant try to make it as thin as possible. …
- Use light. Popping your fondant under a table lamp can really quicken the drying process. …
- Use a hairdryer!
How to make royal icing transfers dry fast?
Royal icing dries faster in a low-humidity environment. If you live in a humid climate, using a dehumidifier in your workspace can make a big difference.Oct 29, 2024
How long does royal icing take to dry?
Allowing royal icing decorations to sit at room temperature to dry is the best way to harden the icing. The minimum amount of drying time required is typically 6-8 hours. However, this time can be changed depending on several variables including the consistency of the icing, humidity, design, etc.
How do you get royal icing to dry faster?
There are two legitimate ways to get royal icing to dry faster: Point the fan directly at the cookies as they dry. The air circulation will help the cookies dry a bit faster (not miracles, though) and will leave the icing with a bit of a sheen.
What is royal icing?
Royal icing is a type of hard white icing that is made from icing sugar and egg whites. This icing makes cakes and cookies look beautiful, but sometimes it can take a while to dry. Luckily, there are multiple ways that you can speed up the process. Leave your cookies to try at room temperature and expose them to as much airflow as possible.
Can royal icing be dried at room temperature?
No. Royal icing is supposed to be dried at room temperature or by using any of the above methods. Storing and attempting to dry the icing in the fridge will only trap more moisture in the icing which will make it runnier and may even ruin all your hard work – not to mention, the cookie may become overly soggy too.
How to dry royal icing cookies properly?
Now, in terms of how to actually dry royal icing cookies properly: royal icing needs to be exposed to air to be able to completely dry. So when you’re done decorating, place the cookies on a flat surface exposed to air. It’s important that the entire bottom of the cookie be on the surface to prevent the bottom of the cookie from getting stale.
Can you put royal icing in the fridge?
As mentioned above, royal icing needs to be exposed to air to be able to dry completely. By putting wet royal icing in the fridge you are not only preventing the icing from actually drying, but the humid environment will also likely make the colors bleed. That said, once the cookies are dry you CAN store them in the freezer.