
This is the perfect, easy sugar cookie icing recipe that hardens when dry, but has a deliciously soft bite. It’s simple to make, easy for decorating, and tastes SO good!
Because we all have different icing preferences, and this one seems to check so many of our boxes, especially when it comes to FLAVOR!
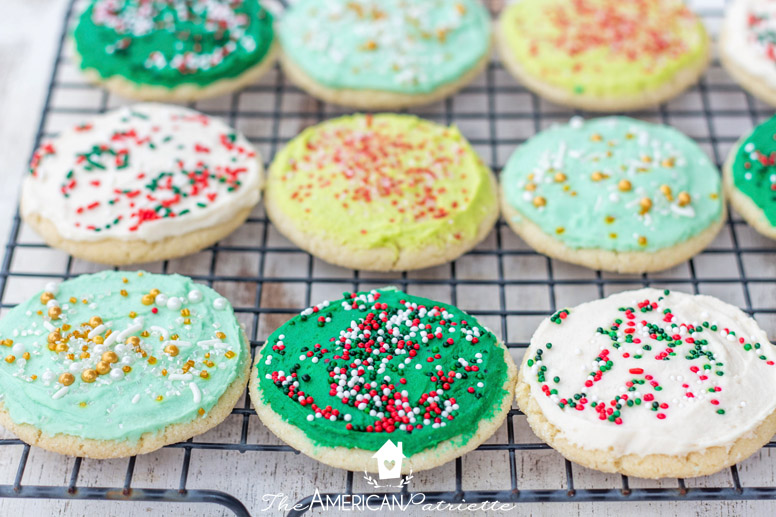
✔️ Easy to make ✔️ Easy to use ✔️ Makes beautiful cookies! ✔️ Completely hardens on the cookies (but still has a soft bite)! ✔️ Actually tastes GOOD and not like chalky candy – WAHOO!
While my buttercream frosting recipe for sugar cookies is absolutely delightful and is still my favorite sugar cookie frosting, some people want an icing recipe that completely hardens & is still easy to make. So, I went on a quest to see if I could develop a simple icing recipe that does harden completely…but, that still has a rich, creamy taste vs. a chalky, candy taste like so many other sugar cookie icings have.
Because really, that’s one of the biggest draws to buttercream, right? It tastes so darn good.
Believe me, this was no easy feat, but I think I got about as close as you can get with this recipe, and I am SO excited to finally have it in your hands!
Just like when I developed my buttercream frosting that hardens recipe, I treated my kitchen like a laboratory for this one, too – I tested, tested, tested (y’all, we had a lot of cookies in our house for months), and I finally came up with a winning combination for both texture AND flavor.
Overall, this is a pretty basic homemade icing recipe except for one STAR ingredient that so many other sugar cookie icings are missing: butter extract! (Yes, there is such a thing, AND! It was super easy for me to find at my grocery store, it was very inexpensive, and it lasts – I’ve used one bottle for dozens of batches of icing.)
TRUST ME on this: for those of you who absolutely love buttercream frosting on sugar cookies but are looking for an easy icing recipe that gets completely solid, this might just become your new favorite recipe to use on Christmas cookies…or for any time of year!
Hey there, baking fam! If you’re tired of your cookie frosting smushin’ and smearin’ all over the place when you stack ‘em or gift ‘em, I’ve got somethin’ special for ya today. We’re divin’ headfirst into the magical world of buttercream frosting for cookies that hardens—yep, a game-changer that keeps your cookies lookin’ as good as they taste! I’ve been messin’ around in my kitchen for years tryin’ to nail this, and lemme tell ya, once you get this right, your holiday trays, party platters, and gift boxes are gonna level up big time
In this ultimate guide, I’m breakin’ down everything you need to know ‘bout makin’ a buttercream that sets firm enough to handle some stackin’ without losin’ that creamy, dreamy flavor we all crave We’ll cover the why, the how, a killer recipe, tips to avoid epic fails, and even some fun twists to make your cookies pop So, grab your mixin’ bowl, and let’s get to it!
Why Buttercream Frosting That Hardens Is a Total Win
First off let’s chat ‘bout why you’d even want a buttercream that hardens for your cookies. Regular buttercream is awesome—silky rich, melt-in-your-mouth goodness—but it’s a hot mess when you’re tryin’ to pack cookies for a bake sale or ship ‘em to your cousin across the country. It stays soft, sticks to everything, and ruins your pretty designs faster than you can say “sugar rush.”
A hardening buttercream, though? It’s like the superhero of frostings. Here’s why I’m obsessed with it:
- Stackable Cookies, No Drama: Once it sets, you can pile your cookies in a tin or box without ‘em stickin’ together or smudgin’ your hard work.
- Transport Like a Boss: Whether it’s a car ride or mailin’ ‘em as gifts, this frosting holds up better than the soft stuff. Ain’t nobody got time for squashed designs!
- Still Tastes Amazin’: Unlike some hard icings that taste like cardboard (lookin’ at you, royal icing), this keeps that buttery, sweet vibe we love.
- Perfect for Decoratin’: It’s stiff enough to pipe cute details or spread smooth for sprinkles, and it won’t stay tacky forever.
Now, full disclosure—it ain’t gonna be rock-hard like royal icing, so don’t expect 100% smudge-proof perfection. But it gets darn close, and for most of us home bakers, that’s plenty good enough!
What Makes Buttercream Harden, Anyway?
Before we jump into mixin’, let’s get nerdy for a sec ‘bout why some buttercreams set firmer than others. It’s all ‘bout the ingredients and how they play together when they dry out. Here’s the lowdown, keepin’ it simple:
- Fat Type Matters: Usin’ butter is classic for flavor, but it can stay soft ‘cause of its moisture. Mixin’ in shortening (like Crisco) or usin’ cold butter helps it firm up ‘cause there’s less water content to keep it gooey.
- Sugar Power: Powdered sugar (aka confectioner’s sugar) is the backbone here. The more you use, the stiffer it gets over time as it kinda “crystallizes” on the surface when exposed to air.
- Liquid Control: Too much liquid—like heavy cream or milk—keeps it creamy but soft. Skippin’ extra liquids or usin’ just a tiny splash helps it dry out faster and harder.
- Air Time: Once you frost your cookies, leavin’ ‘em out uncovered for a few hours lets the surface form a lil’ crust. That’s the magic of hardening!
I’ve tinkered with tons of combos in my kitchen, and trust me, balancin’ these elements is key. Too much butter, and it’s a sticky mess; too little liquid, and it’s grainy as heck. But don’t worry—I’ve got a recipe that nails it!
My Go-To Recipe for Buttercream Frosting That Hardens
Alrighty, let’s get to the good stuff—my fave recipe that I’ve been usin’ for ages to frost sugar cookies and cut-outs. This makes enough for ‘bout 24-30 cookies, dependin’ on how heavy-handed you are with the pipin’ bag. It’s creamy, tasty, and sets firm enough to stack after a few hours. Plus, no corn syrup needed, which I know some of y’all avoid.
Ingredients
Here’s what you’ll need to whip this up. Most of this stuff is prob’ly sittin’ in your pantry already:
| Ingredient | Amount | Notes |
|---|---|---|
| Unsalted Butter (cold) | 3/4 cup (12 tbsp) | Straight from the fridge, cut into chunks for easier mixin’. |
| Vegetable Shortening | 1/4 cup | Helps with firmness; can sub with more butter if ya don’t have it. |
| Powdered Sugar | 4-5 cups | Start with 4, add more if it’s too thin. Sift if it’s clumpy! |
| Vanilla Extract | 2-3 tsp | Pure stuff for best flavor; clear extract if you want whiter frosting. |
| Salt | 1/4 tsp | Just a pinch to balance sweetness. |
| Heavy Cream (optional) | 3-5 tbsp | Only if needed to adjust texture; use sparingly for hardening. |
| Gel Food Coloring | As desired | Optional, for pretty colors; gel won’t mess with consistency like liquid. |
Equipment
Nothin’ fancy required, but these make life easier:
- Stand mixer or hand mixer (stand is faster, hand works if you’re patient).
- Mixin’ bowl and spatula.
- Piping bags or Ziploc baggies (for decoratin’).
- Butter knife or offset spatula (for spreadin’).
Step-by-Step Instructions
Follow along, and don’t rush it— mixin’ right is what gets ya that perfect texture!
- Prep Your Butter: Take that cold butter outta the fridge and chop it into ‘bout 8 small chunks. If you’re usin’ shortening, have it ready at room temp. Cold butter might sound weird, but it’s a trick I’ve learned to help the frosting set better.
- Cream the Fats: Toss the butter (and shortening, if usin’) into your mixin’ bowl. With a paddle attachment on a stand mixer—or regular beaters on a hand mixer—whip it on medium-high for ‘bout 4 minutes ‘til it’s super creamy. Scrape down the sides if bits stick. It’ll look fluffy, and that’s what we want!
- Add Sugar Slowly: Turn the speed to low and start addin’ your powdered sugar, ‘bout a cup at a time. Mix for 2-3 minutes total, scrapin’ the bowl now and then. It might look clumpy—don’t panic, we’re fixin’ that next.
- Flavor and Adjust: Add in the vanilla extract and salt. If it’s too thick to mix, drizzle in heavy cream, just a tablespoon at a time—don’t overdo it! I usually only need 3-5 tbsp max. Crank the speed to high and beat for another 3 minutes ‘til it’s smooth as silk.
- Color If Ya Want: If you’re goin’ for colored frosting, split it into smaller bowls and mix in gel food coloring. Start with a tiny bit—it’s strong stuff—and add more ‘til you get the shade ya like. Stir with a spatula to avoid over-beatin’.
- Frost Them Cookies: Spread it on with a knife for a simple look, or pipe it with a bag for fancy designs. Do this pretty soon after makin’ it ‘cause it’ll start formin’ a crust in an hour or two. Add sprinkles right away if you’re usin’ ‘em.
- Let It Set: Leave the frosted cookies out at room temp, uncovered, for a few hours—overnight is best. The surface will harden up enough to stack gently without stickin’. Don’t cover ‘em ‘til they’re set, or ya might trap moisture and keep it soft.
Quick Note on Hardening
This frosting gets firm enough to stack after settin’ for several hours, but it ain’t gonna be hard as a rock. If you need somethin’ bulletproof for shippin’ or intricate details, ya might wanna look at royal icing instead. But for most of us, this does the trick!
Tips to Make Sure Your Frosting Hardens Like a Champ
I’ve had my fair share of frosting flops over the years—too soft, too grainy, you name it. So, here’s some hard-earned wisdom to keep yours on point:
- Keep Liquid Low: If you’re aimin’ for max firmness, skip the heavy cream unless it’s way too thick to mix. Even then, add just a teaspoon at a time. More liquid = softer frosting.
- Use Shortening for Extra Stiffness: I know some folks ain’t fans, but mixin’ in a lil’ shortening with the butter makes a big diff in how firm it gets. Half butter, half shortening is my go-to for stackable cookies.
- Cold Butter Trick: Startin’ with fridge-cold butter instead of room temp helps the structure hold up better as it dries. Sounds odd, but it works for me every darn time.
- Don’t Skimp on Beatin’: Whippin’ it good for those few minutes gets air in there and blends everything smooth. Grainy frosting won’t set right, so take your time.
- Let ‘Em Breathe: After frostin’, don’t cover the cookies right away. Air exposure helps that crust form. I leave mine on the counter overnight before stackin’.
- Avoid Humidity: If your kitchen’s humid as a swamp, it might take longer to harden—or not set at all. Pop ‘em near a fan or in a dry spot if ya can.
If it still ain’t settin’ after a day, you mighta used too much liquid or not enough sugar. No biggie—just add a lil’ more powdered sugar next batch and cut back on cream.
Variations to Spice Up Your Buttercream Game
One thing I luv ‘bout this frosting is how easy it is to switch up. Wanna get creative? Here’s some ideas I’ve played with that keep the hardening magic while addin’ flair:
- Flavor Twists: Swap out vanilla extract for other flavors like almond, peppermint, or lemon. Just use the same amount—2-3 teaspoons—and taste as ya go. Peppermint’s killer for holiday cookies!
- Spice It Up: Mix in a pinch of cinnamon, gingerbread spice, or pumpkin pie spice for a cozy fall or winter vibe. Start with 1/4 teaspoon and adjust.
- Chocolate Vibes: Add 1/4 cup cocoa powder for a chocolatey kick. You might need a tiny splash more cream to balance the dryness, but keep it minimal.
- Cookie Crumbles: Crush up some Oreos or other fave cookies and fold ‘em in for texture. It’ll still set, just won’t be as smooth for pipin’ detailed stuff.
- Color Crazy: Gel food coloring is your BFF for bright hues without messin’ up the texture. Red and green for Christmas, pastel for Easter—go wild!
Remember, some add-ins like extra cocoa might tweak how firm it gets, so test a small batch first if you’re stackin’ or shippin’.
Storage and Transport—Keepin’ Your Cookies Pretty
Once your cookies are frosted and set, ya gotta store ‘em right to keep that hard surface intact. Here’s how I do it:
- Room Temp Short-Term: If you’re eatin’ or givin’ ‘em away in a day or two, store at room temp in an airtight container. Stack gently to avoid pressure on designs.
- Fridge for Longer: They’ll last up to 5 days in the fridge, but let ‘em come back to room temp before servin’ so the frosting ain’t too hard to bite.
- Freezin’ Option: Wanna make ahead? Freeze frosted cookies after the frosting’s fully set. Layer ‘em with parchment paper in a container so they don’t stick. Thaw in a single layer to avoid condensation messin’ with the colors.
- Transport Tips: For travelin’, stack in a sturdy container with minimal movement. If it’s a long trip, simpler designs (just spread frosting and sprinkles) hold up better than fancy pipin’. I’ve taken mine on 3-hour car rides, and they were fine!
If you’re mailin’ cookies as gifts, this frosting can work for basic designs, but I’d play it safe with somethin’ harder like royal icing for detailed stuff. Better safe than sorry when the post office gets rough!
Troubleshootin’ Common Buttercream Blunders
Even with a solid recipe, stuff can go wonky. Here’s how to fix the usual suspects I’ve run into:
- Too Soft, Won’t Harden: Prob’ly too much liquid or not enough sugar. Mix in more powdered sugar, a tablespoon at a time, ‘til it stiffens. Next time, cut back on cream or milk.
- Grainy Texture: Sugar didn’t blend right—beat longer on high speed. If it’s still gritty, your sugar mighta been clumpy; sift it first next go-round.
- Separates or Looks Weird: Could be over-beatin’ or bad ingredients. Make sure your butter ain’t old, and don’t mix forever once it’s smooth. If it splits, add a lil’ sugar and beat slow.
- Hardens Too Fast to Work With: If it crusts up before you’re done frostin’, stir it again to loosen. Work in smaller batches, or cover unused frosting with plastic wrap touchin’ the surface.
- Colors Bleed or Fade: Liquid food coloring’s the culprit—it adds water and messes with firmness. Stick to gel, and don’t over-mix after colorin’.
Bakin’ is trial and error, y’all. I’ve had batches flop and still eaten the evidence—nobody’s judgin’!
Why This Frosting Is Perfect for Every Occasion
I’ve used this buttercream for everythin’ from Christmas cut-outs to birthday cookies, and it’s never let me down. It’s versatile as heck—spread it thick for a rustic look, pipe swirls for somethin’ fancier, or tint it any color for themed treats. The fact it hardens means I can make dozens ahead of time, stack ‘em in cute tins, and hand ‘em out without stressin’ ‘bout a mess.
Lemme tell ya a quick story: Last holiday season, I made a huge batch of sugar cookies for a family party. Frosted ‘em with this recipe, stacked ‘em in a box, drove 3 hours, and not a single one smudged. My aunt was blown away, thought I’d bought ‘em from a bakery! That’s the kinda win this frosting brings to the table.
Whether you’re a newbie baker or a seasoned cookie queen, this buttercream is gonna be your new bestie. It’s easy enough for a quick weekend project with the kiddos, but the results look pro enough to impress at any event.
Final Thoughts—Get Frostin’ Already!
So, there ya have it—everything I know ‘bout whippin’ up a buttercream frosting for cookies that hardens. It’s all ‘bout gettin’ that balance of buttery richness with a firm set, and with my recipe and tips, you’re set to slay the cookie game. From stackin’ without stickin’ to transportin’ with ease, this frosting solves so many baker probs while keepin’ that yum factor high.
Next time you’re bakin’ up a storm, give this a whirl. Play with flavors, colors, whatever floats your boat—just remember to let it set before ya start packin’ ‘em up. I’d love to hear how it goes for ya, or if you’ve got your own tricks for hardenin’ buttercream. Drop a comment or shoot me a pic of your creations—I’m all ears!
Now, go get that mixer fired up, and let’s make some cookies that look as dope as they taste. Happy bakin’, fam!
Pipe the edges then flood (fill in) the icing.
Some recipes call for you to have a piping icing that’s thicker than the flooding icing, but I think the consistency of this one works well enough for both, especially since you’re not going for pristine detail with this one.
To decorate, just pipe around the edges of the cookie…
…and then fill it in – the same way you’d color a picture – using the same bag/tip you used to give it the outline.
Or, you can just pipe the scribbled look:
Because this frosting begins to set so quickly, you’ll want to add sprinkles soon after you add the icing. I’d add sprinkles after icing at least every 2-3 cookies, if not after icing each cookie individually, just so you make sure they stick to the frosting.
Do I have to use the butter extract? And almond extract?
Well, that also depends. There are SO many other recipes out there for sugar cookie icing, but my goal for this one was to actually nail down a recipe that tastes much more creamy and buttery than typical icings (i.e. other than buttercream). So many of the icings that harden taste too candy-like vs. decadent. Both of these extracts in this icing help give it that huge boost of flavor. This recipe – with this ingredient combo – is a great compromise if you love buttercream frosting but really want the hardness that buttercream can’t allow.
Simple Buttercream frosting for Cutout Cookies that hardens
FAQ
How to get buttercream icing to harden?
So, whether your buttercream is a veritable soup or just a touch runny, the answer is to cool it down. If the buttercream is thin enough to run off a spoon, refrigerate the whole bowl for 20 minutes, just until the frosting begins to harden around the edges.
What is the icing that hardens on cookies?
Royal icing is made with a base of either egg whites or meringue powder, and is opaque white, and sets super hard. It is the icing that is used for super intricate piping, and also for flooding cookies.
How to make buttercream set hard?
If your frosting is too wet or soft, keep adding confectioners’ sugar until the consistency improves. It’s also important that your cake is at room temperature before you start decorating. If your cake is too warm, the buttercream will melt and the frosting won’t set.
Is buttercream frosting good for decorating cookies?
Just like classic vanilla buttercream frosting you love on cakes and cupcakes, this 5-ingredient cookie decorating buttercream is deliciously creamy and sweet. It’s perfect for cookie decorating beginners, and soft-sets on the cookies after a few hours.