
Hey there, fellow food lovers! If you ain’t tried makin’ biscuits in a cast iron skillet yet, lemme tell ya, you’re missin’ out on some serious kitchen magic. There’s somethin’ downright special about pullin’ a batch of golden, flaky buttermilk biscuits outta that heavy, seasoned pan. The bottoms get all crispy, the tops turn a perfect brown, and the insides? Pure, tender heaven. Here at our lil’ cooking corner, we’re obsessed with gettin’ that old-school, down-home flavor just right, and today, I’m spillin’ all the beans on how to whip up cast iron biscuits that’ll make your taste buds dance.
We’re gonna dive deep into why cast iron is the ultimate tool for biscuit-makin’, walk ya through a foolproof recipe, share some insider tips, and even toss in a few ways to jazz ‘em up. Whether you’re a newbie with flour on your apron or a seasoned pro with a skillet older than your grandma, stick with me Let’s get that oven fired up and make some dang good biscuits!
Why Cast Iron Makes the Best Biscuits, Hands Down
First off let’s chat about why we’re so hyped on cast iron for biscuits. This ain’t just some fancy trend—it’s straight-up science and tradition rolled into one.
- Heat Retention Like a Boss: Cast iron holds heat like nobody’s business. Once that skillet gets hot, it stays hot, givin’ your biscuits a consistent bake. That means crispy bottoms and tops without no soggy middles.
- Helps ‘Em Rise High: The tall sides of a cast iron skillet act like a lil’ wall for your dough to climb. When you pack those biscuits in close, touchin’ each other, they got nowhere to go but up. Fluffy, tall biscuits? Heck yeah!
- Crispy Bottoms for Days: That heat retention I mentioned? It also gives ya a golden, crunchy base on every biscuit. Perfect for slatherin’ with gravy or holdin’ up to a hearty breakfast sammie without fallin’ apart.
- Old-School Flavor Vibes: There’s just somethin’ about cookin’ in cast iron that feels… right. It’s like every meal carries a bit of history, a touch of that rustic charm. Plus, a well-seasoned skillet adds a subtle depth to the taste.
I remember the first time I baked biscuits in my ol’ cast iron pan—man it was a game-changer. The texture was spot on, and I felt like I was channelin’ some Southern granny’s spirit. If you’ve got a skillet sittin’ around it’s time to put it to work. Don’t got one? Snag a 10 or 12-inch one; it’s a kitchen must-have.
Your Go-To Cast Iron Biscuit Recipe
Alrighty, let’s get down to the nitty-gritty. This recipe is for classic buttermilk biscuits baked in a cast iron skillet. It’s simple, straight-up, and yields about 12-14 biscuits if you’re usin’ a 12-inch pan. I’ve made this a buncha times, tweakin’ it ‘til it was just right, so trust me on this one.
Ingredients Table
| Ingredient | Amount | Notes |
|---|---|---|
| All-purpose flour | 2 cups | Plus a bit more for dustin’ the counter |
| Baking powder | 1 tablespoon | Make sure it ain’t expired! |
| Baking soda | 1/2 teaspoon | Same deal, check the date. |
| Salt | 2 teaspoons | Adjust if you’re sensitive to salty. |
| Sugar | 2 teaspoons | Just a pinch for balance. |
| Unsalted butter | 4 tablespoons | Very cold, cut into small chunks. |
| Vegetable shortening | 4 tablespoons | Chill this for an hour beforehand. |
| Buttermilk | 1 cup | Cold as heck, keeps the dough right. |
| Egg | 1 | Beaten before mixin’ in. |
| Melted butter | 3 tablespoons | For brushin’ on top after bakin’. |
Equipment You’ll Need
- A 12-inch cast iron skillet (10-inch works too, just might be tighter).
- Biscuit cutter or a round glass (about 2-3 inches wide).
- mixin’ bowl, fork or pastry cutter, and a clean counter space.
Step-by-Step Instructions
- Preheat That Oven: Crank your oven to 425 degrees Fahrenheit. If you wanna preheat your skillet too, pop it in there while the oven heats up. It’ll help with that crispy bottom.
- Mix the Dry Stuff: In a big ol’ bowl, whisk together the flour, baking powder, baking soda, salt, and sugar. Get it nice and combined.
- Cut in the Fats: Grab your cold butter and shortening. Usin’ a fork or a pastry cutter, mash ‘em into the dry mix ‘til it looks like crumbly peas. You want lil’ ribbons of fat in there—that’s what makes ‘em flaky. Don’t overdo it; keep it quick so the fat stays cold.
- Add the Wet Stuff: Pour in the buttermilk and that beaten egg. Stir gently, just ‘til it comes together into a sticky, wet dough. Don’t mix too much, or you’ll end up with tough biscuits. Ain’t nobody want that!
- Shape the Dough: Dust your counter with flour and dump the dough out. Sprinkle a bit more flour on top if it’s real sticky. Press it into a rectangle, then cut it into 4 pieces with a scraper or knife. Stack ‘em up to make layers, then press it out again. Fold it in half, press, fold again—do this about 4 times total to build them flaky layers.
- Cut ‘Em Out: Press the dough to about 3/4-inch thick. Use your biscuit cutter or glass to cut out rounds. Don’t twist the cutter; just push straight down. Place each biscuit in your skillet, makin’ sure they touch each other and the sides of the pan.
- Bake ‘Em Up: If your skillet ain’t preheated, that’s fine—just pop it in the oven now. Bake for 12-15 minutes, or ‘til the tops are golden brown. Keep an eye on ‘em; ovens can be sneaky.
- Finish with Butter: Pull that skillet out (use a mitt, it’s hot!) and brush the tops with melted butter right away. Serve ‘em warm for max yumminess.
There ya go! That’s the basic recipe I swear by. The first time I made these, I was shocked at how tall they got in the skillet. It’s like they were showin’ off or somethin’!
Tips for Nailing Cast Iron Biscuits Every Time
Now, I’ve burned a few batches in my day, so lemme save ya some trouble with these hard-earned nuggets of wisdom.
- Keep Everything Cold: Your butter, shortening, and buttermilk gotta be chilled. If the fat melts before bakin’, you lose that flaky texture. I even stick my bowl in the fridge sometimes if it’s a hot day.
- Don’t Overwork the Dough: Mix just ‘til it holds together, and don’t knead it like bread. Foldin’ is key for layers, but too much handlin’ makes ‘em tough as leather.
- Biscuits Gotta Touch: When placin’ ‘em in the skillet, make sure they’re snug against each other. This forces ‘em to rise up instead of spreadin’ out.
- Check Your Leaveners: Old baking powder or soda won’t do squat. If they’re past their date, your biscuits won’t puff up proper. Toss ‘em and get fresh ones.
- Season Your Skillet: A well-seasoned cast iron pan won’t stick, and it adds a lil’ extra flavor. If yours is lookin’ rough, give it a quick season with some oil before bakin’.
I once forgot to check my baking powder, and my biscuits came out like hockey pucks. Lesson learned the hard way, y’all. Stick to these tips, and you’ll be golden.
Why Cast Iron Biscuits Are Perfect for Any Meal
One thing I love about these biscuits is how versatile they are. They ain’t just for breakfast, though they shine there. Here’s a few ways we use ‘em at our house:
- Breakfast Glory: Split ‘em open and drown ‘em in sausage gravy. Or smear on some butter and jam for a quick mornin’ bite.
- Dinner Sidekick: Serve alongside a hearty stew or chili. That crispy bottom soaks up broth like a dream without fallin’ apart.
- Sandwich Base: Use ‘em for a killer breakfast sandwich with eggs, bacon, and cheese. The sturdy texture holds up real nice.
- Sweet Treat: I’ve even drizzled honey on leftovers for a lil’ dessert vibe. Sounds wierd, but trust me, it works.
Last weekend, I made a big pot of beef stew and paired it with these biscuits. My family couldn’t stop ravin’ about how the biscuits were the perfect dippin’ tool. It’s them little moments that make cookin’ so worth it.
Variations to Spice Up Your Cast Iron Biscuits
If you’re feelin’ adventurous, there’s plenty of ways to switch up this basic recipe. Here’s a couple ideas I’ve messed around with:
- Cheesy Biscuits: Toss in a cup of shredded cheddar when you mix the dough. It melts into gooey pockets—pure bliss.
- Herb-Infused: Add a teaspoon of dried rosemary or thyme to the dry mix. Gives ‘em a fancy, savory kick that’s great with dinner.
- Sweet Biscuits: Up the sugar to a couple tablespoons and sprinkle some cinnamon in. Perfect for a dessert biscuit with whipped cream or fruit.
- Bacon Bits: Crumble some cooked bacon into the dough before cuttin’. Breakfast in every bite, y’all!
I tried the cheesy version for a potluck once, and folks were fightin’ over the last one. Experiment a bit—cast iron biscuits are forgiving if ya don’t go too crazy.
Troubleshootin’ Common Biscuit Blunders
Even with the best recipe, stuff can go sideways. Here’s how to fix some common oopsies I’ve run into:
- Biscuits Didn’t Rise: Check if your baking powder or soda is fresh. Also, make sure your oven’s at the right temp—too low, and they won’t puff.
- Too Tough or Dense: You probably overmixed or overkneaded. Next time, handle the dough as little as possible. Keep it light and quick.
- Burnt Bottoms: If your skillet was preheated too long or the oven’s too hot, the bottoms can scorch. Lower the temp a smidge or don’t preheat the pan as long.
- Stuck to the Skillet: A poorly seasoned pan can cause stickin’. Rub a thin layer of oil on the skillet before placin’ the biscuits, or reseason it after cleanin’.
I’ve had my share of flat, sad biscuits, but tweak one thing at a time, and you’ll figure out what works in your kitchen. Don’t give up—practice makes perfect!
A Lil’ History on Cast Iron Cookin’
Cast iron’s been around forever, and there’s a reason it’s still kickin’ in modern kitchens. Back in the day, it was the go-to for pioneers and homesteaders ‘cause it’s tough as nails and can handle open fires. Biscuits baked in cast iron over a campfire? That’s some real-deal history right there. Nowadays, we’ve got fancy ovens, but the skillet still brings that same rugged charm to the table. I like thinkin’ I’m carryin’ on a tradition every time I fire up mine. It’s like a lil’ nod to the past while I’m chowin’ down in the present.
Carin’ for Your Cast Iron Skillet
If you’re new to cast iron, lemme drop a quick word on keepin’ it in tip-top shape. A good skillet can last generations if ya treat it right.
- Clean It Right: Don’t use soap if you can help it. Just scrape off food bits with a brush or cloth, rinse with hot water, and dry it completely to avoid rust.
- Season It Up: Every now and then, rub a thin layer of vegetable oil over it and bake at 350 degrees for an hour. This keeps it non-stick and happy.
- Store It Dry: Moisture is the enemy. Keep it in a dry spot, maybe with a paper towel inside to soak up any sneaky dampness.
I’ve got a skillet that’s been passed down from my great-aunt, and it’s still my favorite. A lil’ care goes a long way, trust me.
Pairin’ Your Biscuits with the Perfect Spreads
Now, a biscuit ain’t complete without somethin’ to slather on it. Here’s what we love at our table:
- Classic Butter: Can’t go wrong with a pat of butter meltin’ into a hot biscuit. Add a sprinkle of salt if it’s unsalted.
- Homemade Jam: Strawberry, blackberry, whatever ya got—sweet and tangy cuts through the richness.
- Gravy Galore: Whip up a quick sausage or white gravy. It’s messy, but oh-so-worth it.
- Honey Love: Drizzle some honey for a sweet fix. It’s my go-to when I’m feelin’ indulgent.
I’ve been known to eat a biscuit with just a smear of butter straight outta the skillet, standin’ over the stove. No shame in my game—it’s that good.
Final Thoughts on Cast Iron Biscuits
Makin’ biscuits in a cast iron skillet ain’t just about the food; it’s about the feelin’. There’s a warmth to it, a connection to somethin’ timeless. Whether you’re servin’ ‘em up for a big family breakfast or just sneakin’ one as a late-night snack, these biscuits got a way of makin’ any moment better. I’ve shared my recipe, tips, and a whole lotta love for cast iron with ya, so now it’s your turn to get in the kitchen and give it a whirl.
Got a twist on this recipe or a story about your own cast iron adventures? Drop a comment below—I’d love to hear ‘bout it. And if you’re diggin’ these vibes, share this post with your crew. Let’s keep the skillet sizzlin’ and the biscuits risin’!
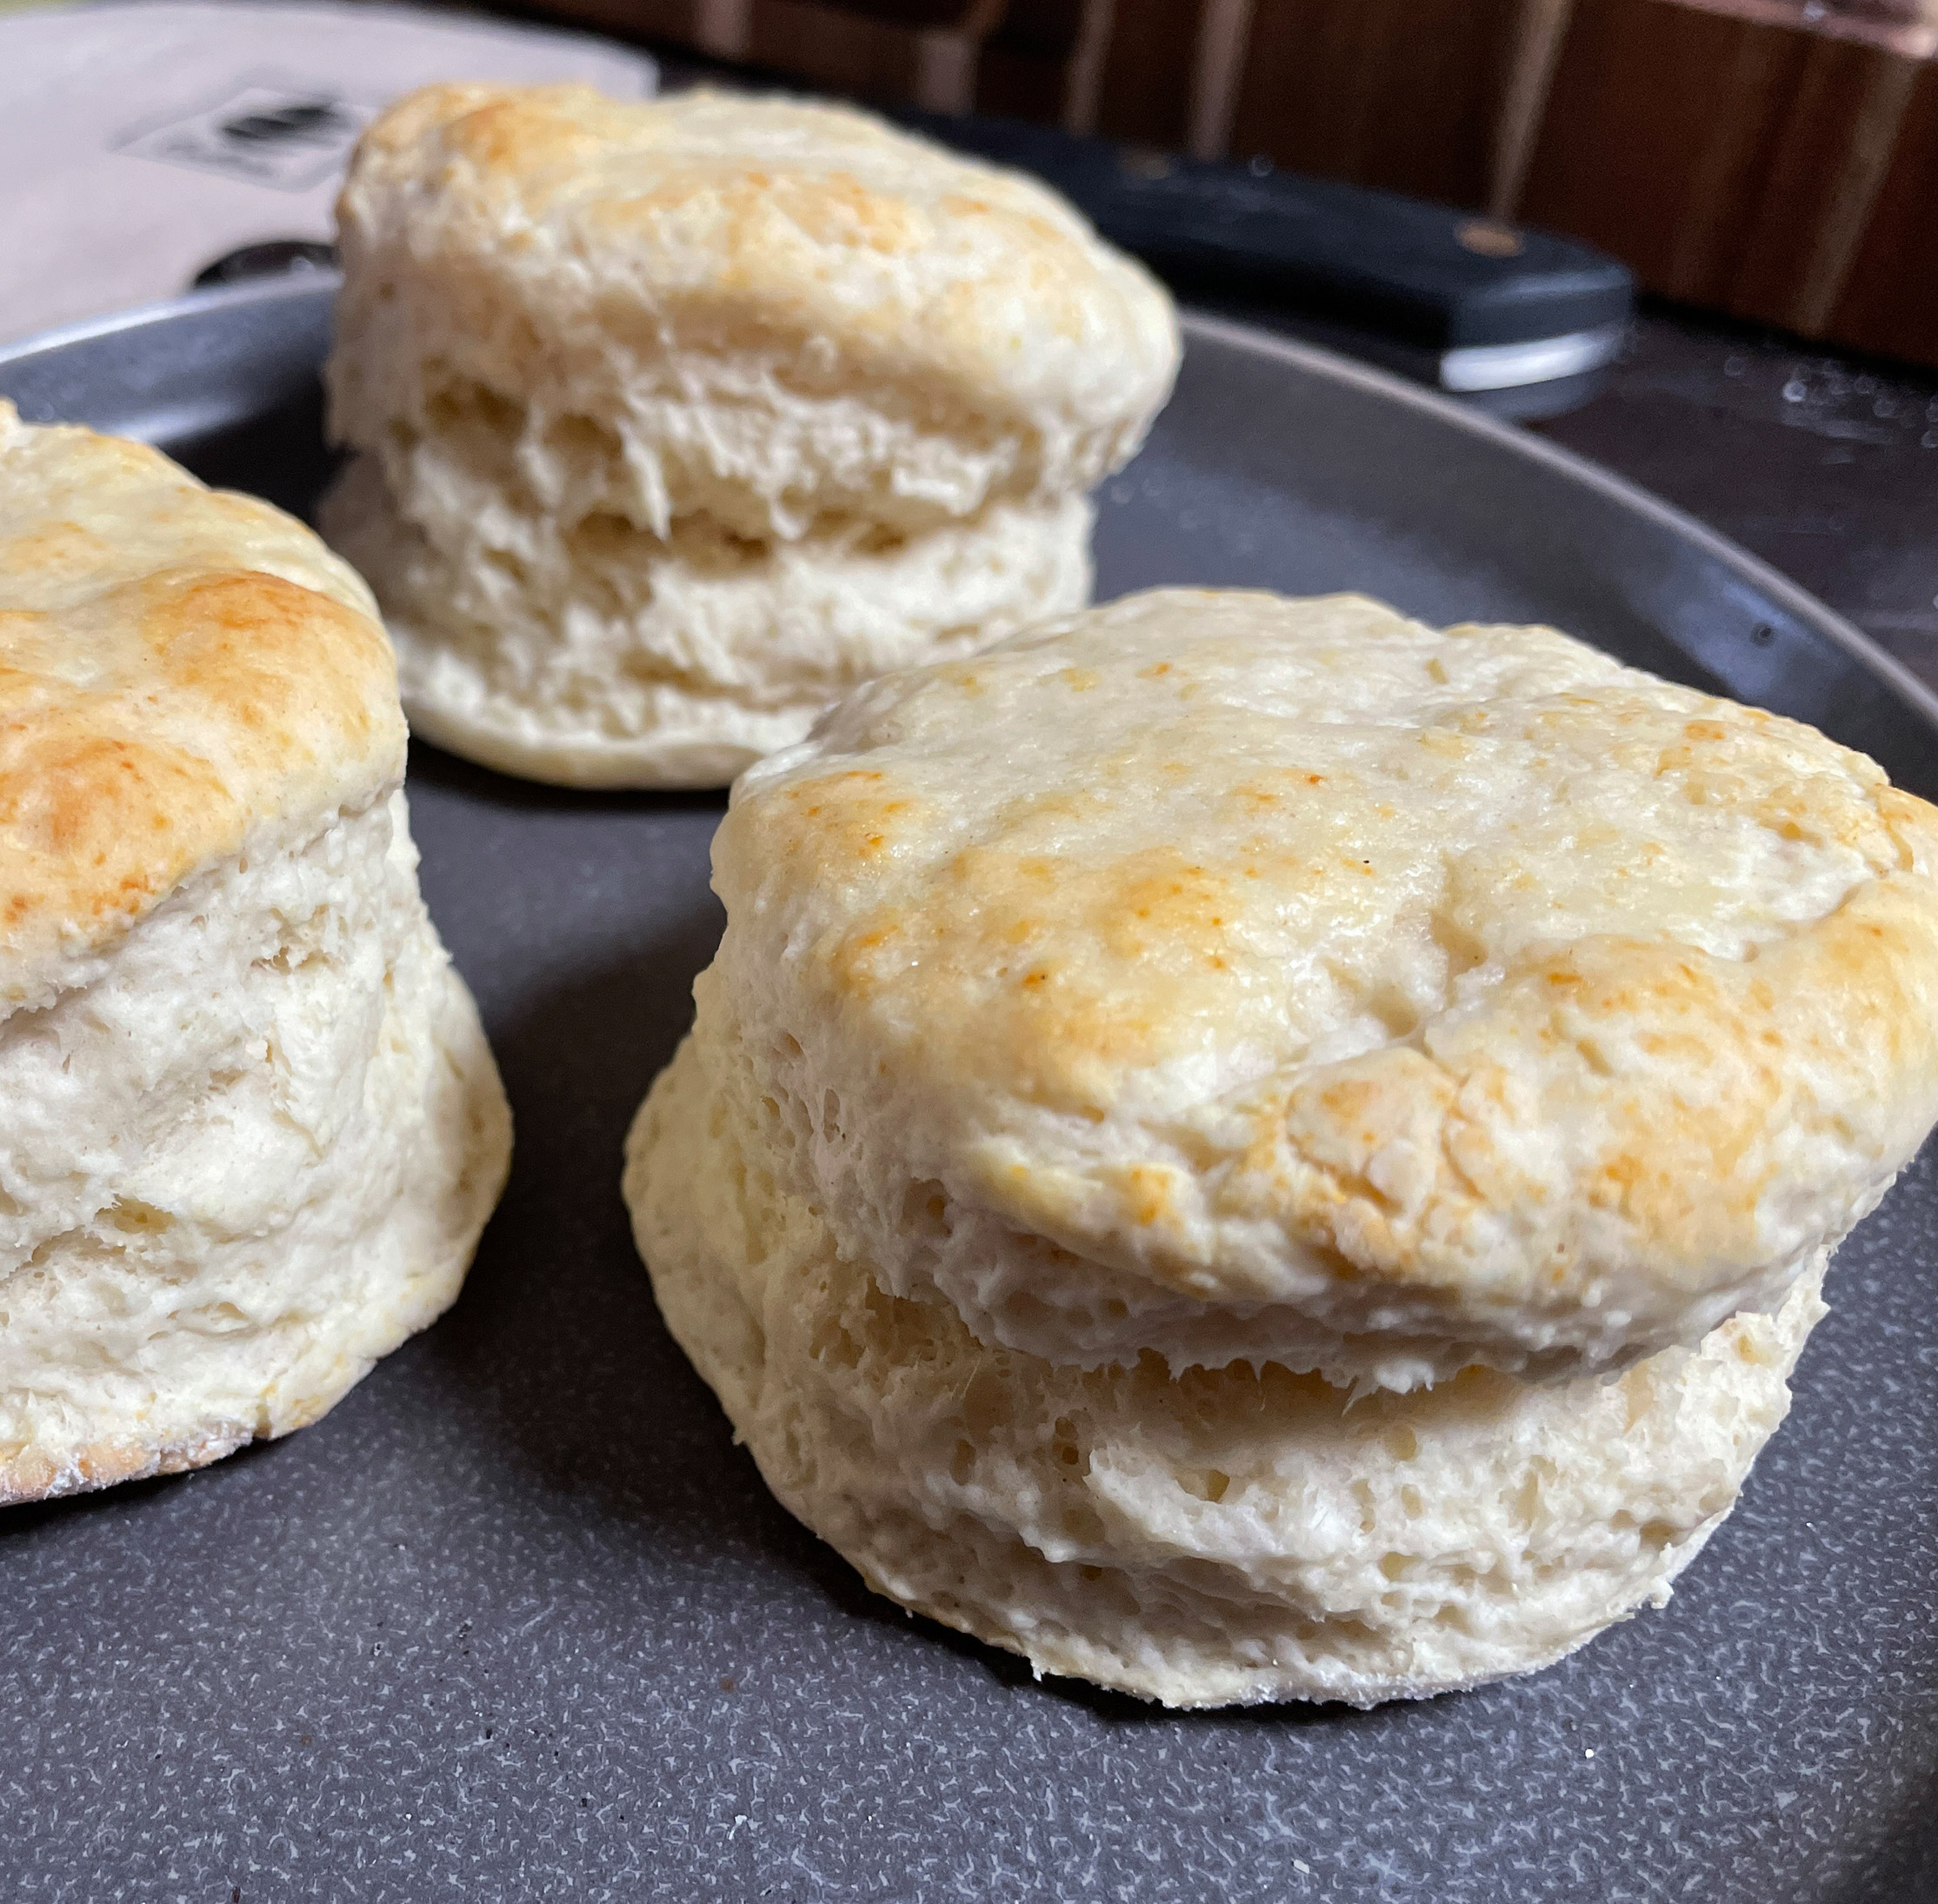
Buttery Old Fashioned Cast Iron Biscuits!
0