
Malted waffles with malted milk powder stirred into the batter griddle up perfectly golden brown and crispy! This is the perfect waffle choice for sweet or savory dishes and our pick for the best chicken and waffles.
Weve been on a serious waffle kick around here. After taste-testing several new recipes, these malted waffles are easily my personal favorites.
Most waffles that use buttermilk have a softer texture straight out of the waffle maker but crisp up in the toaster or oven.
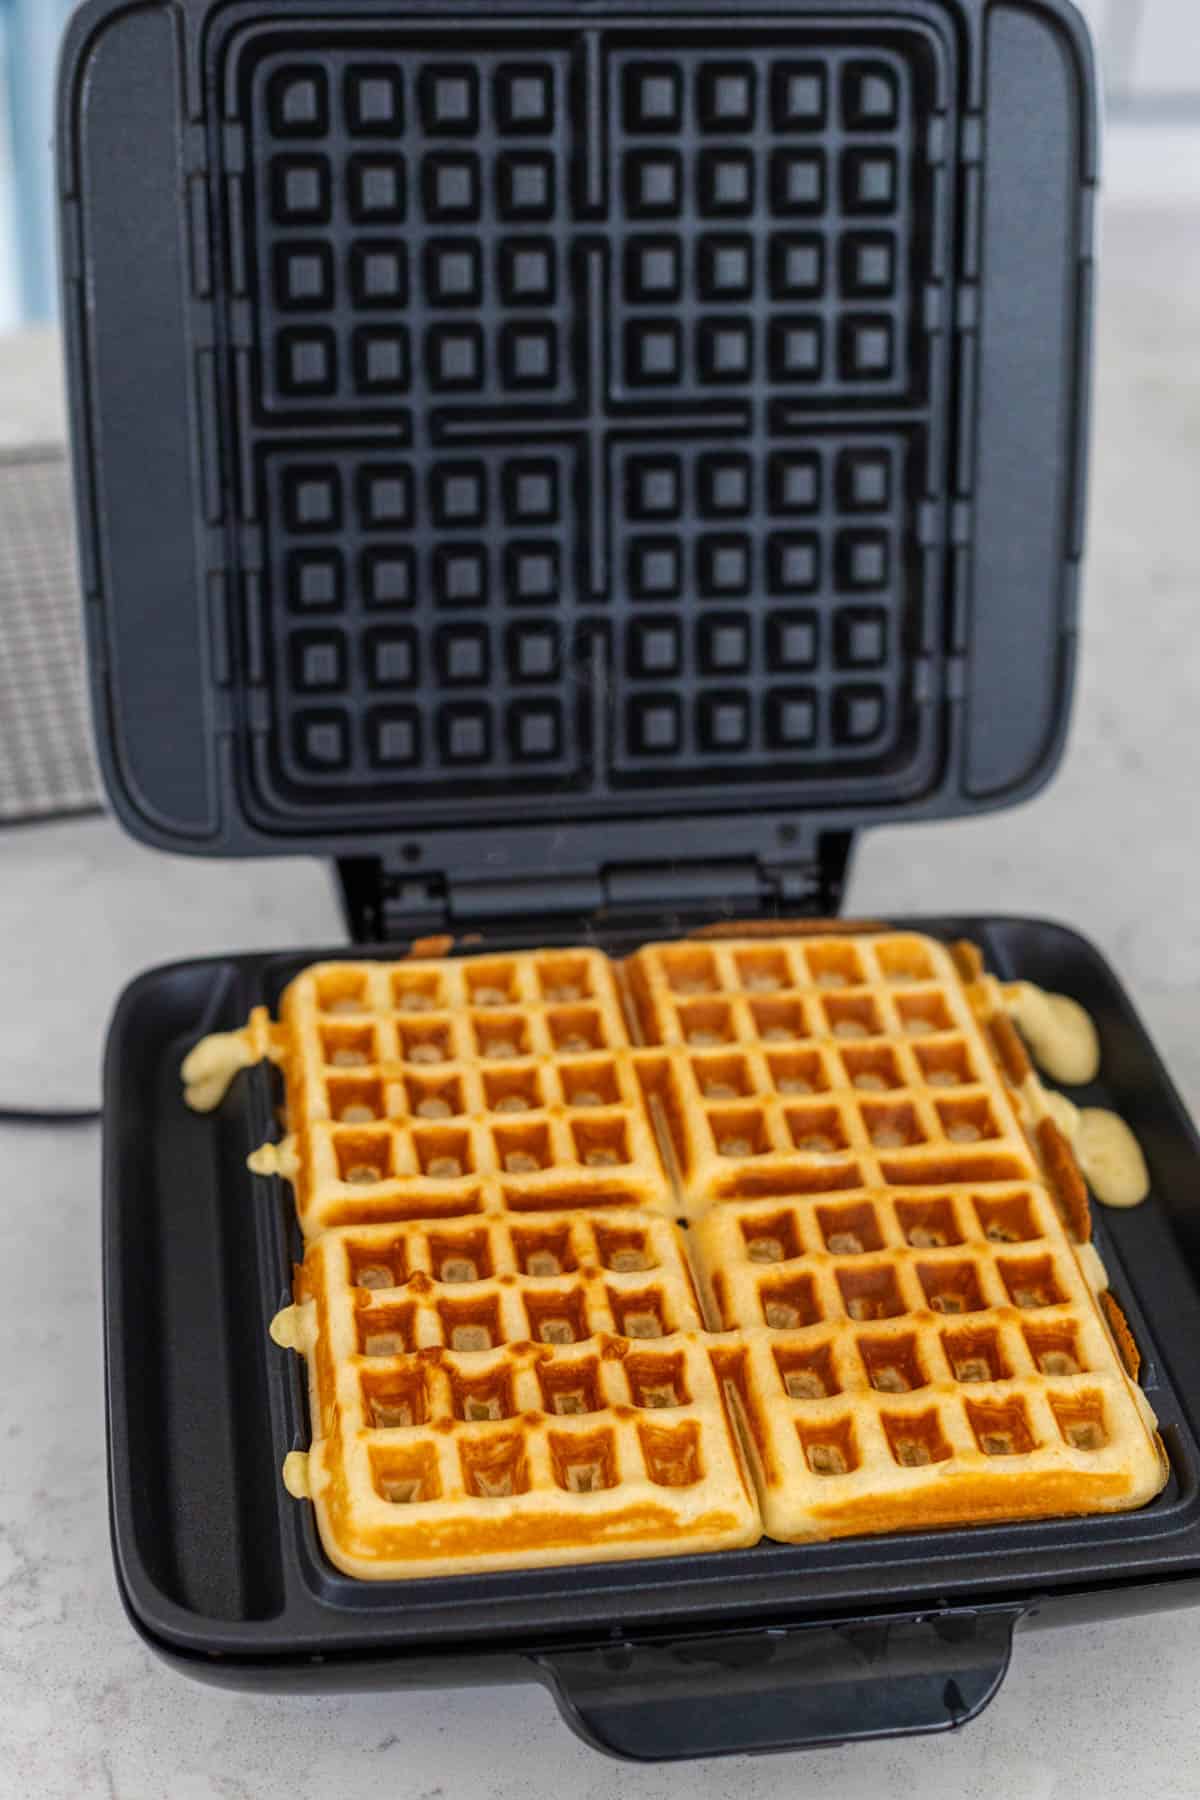
These malted waffles are made with cornstarch in the mix and come out of the waffle maker perfectly crispy and a gorgeous golden brown.
Hey there, waffle lovers! If you ain’t tried malted waffles yet, lemme tell ya, you’re missin’ out on somethin’ real special These ain’t your regular, run-of-the-mill waffles. Nah, malted waffles got a lil’ extra soul—a sweet, nostalgic flavor that takes you straight back to old-school diners and malt shakes. At Golden Waffles, we’re all about bringin’ that cozy, retro vibe to your breakfast table. So, grab a cup of joe, and let’s dive into what makes malted waffles the bomb, how to whip ‘em up, and why they’re gonna be your new go-to mornin’ treat
What Are Malted Waffles, Anyway?
Alright, let’s break it down real simple. Malted waffles are just waffles with a twist—they’re made with malted milk powder mixed into the batter If you’re wonderin’ what that is, think of it as the stuff that gives malted milkshakes their signature taste It’s a powdery mix of malted barley, wheat, and milk that adds a sweet, kinda earthy flavor to whatever you throw it in. In waffles, it brings a subtle richness that pairs like a dream with syrup, butter, or even some fresh fruit.
Why’s this matter? ‘Cause it turns a plain ol’ waffle into somethin’ memorable. It’s like givin’ your breakfast a lil’ hug from the past. Plus that malt powder does somethin’ funky to the texture—makes ‘em a tad chewier, in a good way, while still keepin’ that crispy edge we all crave.
Why Malted Waffles Are a Game-Changer
Before we get to the nitty-gritty of makin’ ‘em, lemme hype ya up on why malted waffles deserve a spot in your kitchen:
- Flavor Blast: That malty taste is unique—sweet, milky, with a hint of somethin’ you can’t quite place. It’s nostalgia in every bite.
- Texture Magic: When done right, these waffles come out crispy on the outside, fluffy inside. The malt helps with that chew factor.
- Versatility: You can go classic with syrup, or get wild with toppings like whipped cream, berries, or even a scoop of ice cream if you’re feelin’ fancy.
- Comfort Food Vibes: There’s somethin’ ‘bout malted waffles that just feels like a warm blanket on a chilly mornin’. It’s pure comfort, fam.
I remember the first time I had one—thought it was just another waffle till that malt hit me. Man, I was hooked! And I bet you will be too once we get cookin’.
The Secret to Killer Malted Waffles: Overnight Batter
Now, I ain’t gonna lie to ya—makin’ the best malted waffles takes a lil’ patience. The secret sauce? Lettin’ the batter sit overnight in the fridge. Why? ‘Cause we’re usin’ yeast instead of just baking powder, and that slow rise gives you a texture that’s outta this world—light, airy, and crisp all at once. Trust me, I’ve tried the quick way, and it just ain’t the same.
Here’s the deal: yeast needs time to do its thang, fermentin’ and buildin’ flavor. Plus, with malted milk powder in the mix, that overnight chill lets all them flavors meld together. So, if you wanna impress your crew with waffles they’ll rave about, plan ahead. I promise, it’s worth the wait.
How to Make Malted Waffles: Step-by-Step
Alright, let’s roll up our sleeves and get to it. This recipe is beginner-friendly, even if you ain’t never worked with yeast before. I’ve burned a few batches in my day, so I’m gonna walk ya through every step to avoid my mistakes. This makes about 7-8 big, Belgian-style waffles, perfect for a family brunch or freezin’ for later.
Ingredients You’ll Need
| Ingredient | Amount | Notes |
|---|---|---|
| Whole Milk | 10 oz | Helps with browning and richness. Warm it up, but don’t boil! |
| Water | 8 oz | Works with malt powder; keeps waffles from gettin’ too dense. |
| Vegetable Oil | 4 Tablespoons | For tenderness. You can swap with ghee for a buttery kick. |
| Eggs | 2 | Adds structure and crispiness. |
| Vanilla Extract | 2 teaspoons | Brings warmth to the flavor party. |
| All-Purpose Flour | 13 oz | The base for structure. Measure it right! |
| Cornstarch | 2 oz | Secret to extra crispiness. Skip if ya don’t have it, add more flour. |
| Malted Milk Powder | 2 oz | The star! Gives that signature malt taste. Find it in most grocery spots. |
| Sugar | 2 Tablespoons | Just a touch of sweet to balance things out. |
| Kosher Salt | 2 teaspoons | Enhances all them flavors. Adjust if usin’ a diff type of salt. |
| Instant Yeast | 1 ½ teaspoons | For that slow rise. Active dry works too, just proof it first. |
Equipment
- Small saucepan (to warm liquids)
- Medium bowl (for eggs)
- Large bowl (for dry stuff)
- Whisk (or fork, if that’s all ya got)
- Belgian waffle maker (any waffle iron works, just adjust batter amount)
- Plastic wrap (to cover batter)
Instructions: Let’s Make Some Magic
- Warm the Liquids: Grab that saucepan and heat up your milk, water, and oil over medium heat. You want it warm—around 115-120°F. Too hot, and you’ll kill the yeast; too cold, and it won’t wake up. Takes about 5 minutes. Set it aside once it’s ready.
- Whisk Eggs and Vanilla: In your medium bowl, whisk them eggs and vanilla till they’re frothy and a lil’ lighter in color. Takes a couple minutes of elbow grease. This helps with fluffiness, so don’t skip it.
- Mix Dry Ingredients: In the big bowl, toss together flour, cornstarch, malted milk powder, sugar, salt, and yeast. Whisk it good so there’s no lumps.
- Combine Wet and Dry: While whiskin’ the dry stuff, slowly pour in the warm milk mix. Keep at it till it’s mostly smooth—a few lil’ lumps are fine. Should take just a few seconds.
- Add Eggs: Give them eggs one more quick whisk, then pour ‘em into the batter. Scrape every bit outta the bowl with a spatula. Mix till it’s all combined.
- Chill Overnight: Cover the bowl with plastic wrap and pop it in the fridge for 12-24 hours. This is where the magic happens—flavor builds, texture gets perfect.
- Preheat and Cook: Next mornin’, get that waffle iron hot—crank it to the highest settin’ if ya can, and let it preheat for a solid 10 minutes. Stir the batter (don’t worry if it looks funky), then cook according to your iron’s instructions. Aim for deep golden brown and crispy edges. Usually takes about 3 minutes per waffle.
- Serve Hot: These babies are best right off the iron when they’re at peak crunch. If servin’ a crowd, keep ‘em warm in a single layer on a rack in a 300°F oven. Don’t stack ‘em, or they’ll go soggy.
Pro Tip from Yours Truly
I learned the hard way—don’t let ‘em sit too long after cookin’. They stay crispy for like 5 minutes before the steam softens ‘em up. So, either eat ‘em quick or use that oven trick. And hey, if your waffle maker’s a diff size, you might get more or less waffles. Just roll with it!
Where to Find Malted Milk Powder?
If you’re scratchin’ your head wonderin’ where to snag malted milk powder, don’t sweat it. Most big grocery stores got it near the hot chocolate or baking stuff. Look for brands like Carnation or Ovaltine—any plain malted milk powder will do the trick. If you’re stuck, check online or hit up a specialty food shop. It’s worth the hunt, I swear!
Variations to Spice Up Your Malted Waffles
One thang I love ‘bout waffles is how you can switch ‘em up. Here’s a few ideas to play with once you’ve nailed the basic malted waffle recipe:
- Gluten-Free Malted Waffles: Swap the regular flour for a gluten-free blend. You might need to tweak the liquid a bit ‘cause GF flours soak up more. Keep that malt powder in for the flavor—it’s usually safe for most diets, but double-check the label.
- Buttery Malted Waffles: Use ghee instead of oil like I mentioned. It gives a richer, buttery taste that’s just divine with the malt.
- Half-Batch for Solo Eats: If it’s just you or a small crew, cut the recipe in half. Use 5 oz milk, 4 oz water, 2 tbsp oil, 6.5 oz flour, 1 oz each of cornstarch and malt powder, 1 tbsp sugar, 1 tsp salt, ¾ tsp yeast, 1 egg, and 1 tsp vanilla. Makes 3-4 waffles.
- Big Batch for Parties: Got a crowd? Scale up to 15 oz milk, 12 oz water, 6 tbsp oil, 19.5 oz flour, 3 oz each cornstarch and malt powder, 3 tbsp sugar, 3 tsp salt, 2 ¼ tsp yeast, 3 eggs, and 3 tsp vanilla. Yields 12-13 waffles to feed the whole gang.
What If You Don’t Dig Malt?
Hey, no judgement here if malt ain’t your jam. You can still make killer waffles by skippin’ the malted milk powder. Just use all milk instead of the milk-water combo, and bump up the flour a tad to keep the batter right. It won’t have that malty vibe, but you’ll still get fluffy, yummy waffles. Or, experiment with other flavors—maybe a pinch of cinnamon or cocoa powder to mix things up.
Toppings and Pairings: Take It to the Next Level
Malted waffles are like a blank canvas, ready for whatever you wanna throw on ‘em. Here’s some ideas that me and my fam can’t get enough of:
- Classic Combo: Drizzle with maple syrup and a pat of butter. The malt and maple together? Pure heaven.
- Fruit Frenzy: Top with fresh strawberries, bananas, or blueberries. The sweetness of the fruit cuts through the richness real nice.
- Whipped Cream Dream: A dollop of whipped cream and maybe some chocolate shavings if you’re feelin’ extra. Makes it dessert-worthy.
- Savory Twist: Skip the sweet and go for fried chicken on top. Yeah, I said it—chicken and waffles with a malty base is next-level comfort food.
Pair ‘em with a strong cup of coffee or a cold glass of milk to really bring out that diner feel. I’m tellin’ ya, it’s like steppin’ back in time.
Storin’ and Reheatin’ Malted Waffles
Made too many? No prob. Malted waffles store like champs. Pop leftovers in the fridge for 2-3 days in an airtight container. For longer, toss ‘em in a freezer bag—squeeze out the air first—and they’ll keep for a month or two.
To reheat, don’t just zap ‘em in the microwave ‘cause they’ll get rubbery. Microwave for like 20 seconds to soften, then pop ‘em back in a hot waffle iron for 30-45 seconds to recrisp. No iron? A toaster oven on the toast settin’ works too—just watch so the edges don’t burn. I’ve saved many a breakfast this way, trust me.
A Lil’ History on Malt in Food
Wanna know why malt feels so retro? It’s been around forever, man. Back in the day, malted milk was a health drink—docs even prescribed it for kiddos and sick folks ‘cause it was easy to digest. Then, soda shops started mixin’ it into shakes, and boom, it became a treat. That sweet, grainy flavor stuck around in candies and desserts, and now it’s makin’ a comeback in stuff like our malted waffles. It’s like a lil’ piece of history on your plate.
I reckon that’s why I’m so drawn to it. It reminds me of stories my gran used to tell ‘bout sippin’ malts at the corner store. Makin’ these waffles feels like keepin’ that memory alive, ya know?
Tips and Tricks for Waffle Success
I’ve messed up enough waffle batches to learn a thing or two. Here’s my hard-earned wisdom to keep ya from flubbin’ it:
- Don’t Overmix: When combin’ wet and dry, mix just till it’s together. Too much stirrin’ makes tough waffles, and nobody wants that.
- Hot Iron is Key: A cold waffle maker is your enemy. Preheat it good and long—hot iron equals crispy edges.
- Don’t Peek: Resist the urge to lift the lid early. Let it cook till the steam slows down or your timer’s up. Peekin’ can tear the waffle.
- Batch Size Matters: If your iron’s small, don’t overfill. Pour just enough batter to spread without spillin’ over. Learned that after a messy mornin’ or two!
- Clean as Ya Go: Brush off crumbs or grease your iron between batches with a lil’ oil. Keeps things stick-free.
Why Make Malted Waffles at Home?
Sure, you could grab a mix from somewhere, but makin’ malted waffles from scratch is where it’s at. First off, you control what goes in—no weird additives or fake stuff. Second, the smell of ‘em cookin’ in your kitchen? Unbeatable. And third, it’s a fun lil’ project. I get a kick outta seein’ my batter turn into golden, crispy perfection. Plus, you can tweak it to your likin’—more malt, less sugar, whatever floats your boat.
Malted Waffles for Every Occasion
These waffles ain’t just for lazy Sunday breakfasts (though they’re perfect for that). Here’s how we roll with ‘em at my house:
- Weekday Win: Make a big batch on the weekend, freeze ‘em, and reheat for quick mornin’ meals. Beats cereal any day.
- Brunch Party: Serve up a waffle bar with tons of toppings—let everyone build their own. It’s a crowd-pleaser.
- Holiday Treat: Christmas mornin’ with malted waffles topped with cinnamon whipped cream? Yes, please. It’s become our tradition.
- Late-Night Snack: I ain’t ashamed to admit I’ve made waffles at midnight. Top with ice cream, and it’s the best dessert ever.
Final Thoughts: Get Flippin’!
So, there ya have it, folks—everything ya need to know ‘bout malted waffles. From that sweet, old-timey flavor to the crispy, fluffy texture, they’re a breakfast upgrade you didn’t know you needed. I’ve shared my fave recipe, some handy tips, and a whole lotta ways to enjoy ‘em. Now, it’s your turn to get in the kitchen and whip up a batch. Trust me, once you taste that malty goodness, there’s no goin’ back to plain waffles.
Got a fave topping or a funny waffle fail story? Drop it in the comments—I’d love to hear how ya make these your own. And hey, if ya found this helpful, share it with your breakfast crew. Let’s spread the malted waffle love far and wide. Catch ya later, and happy cookin’!

How to Make Malted Waffles
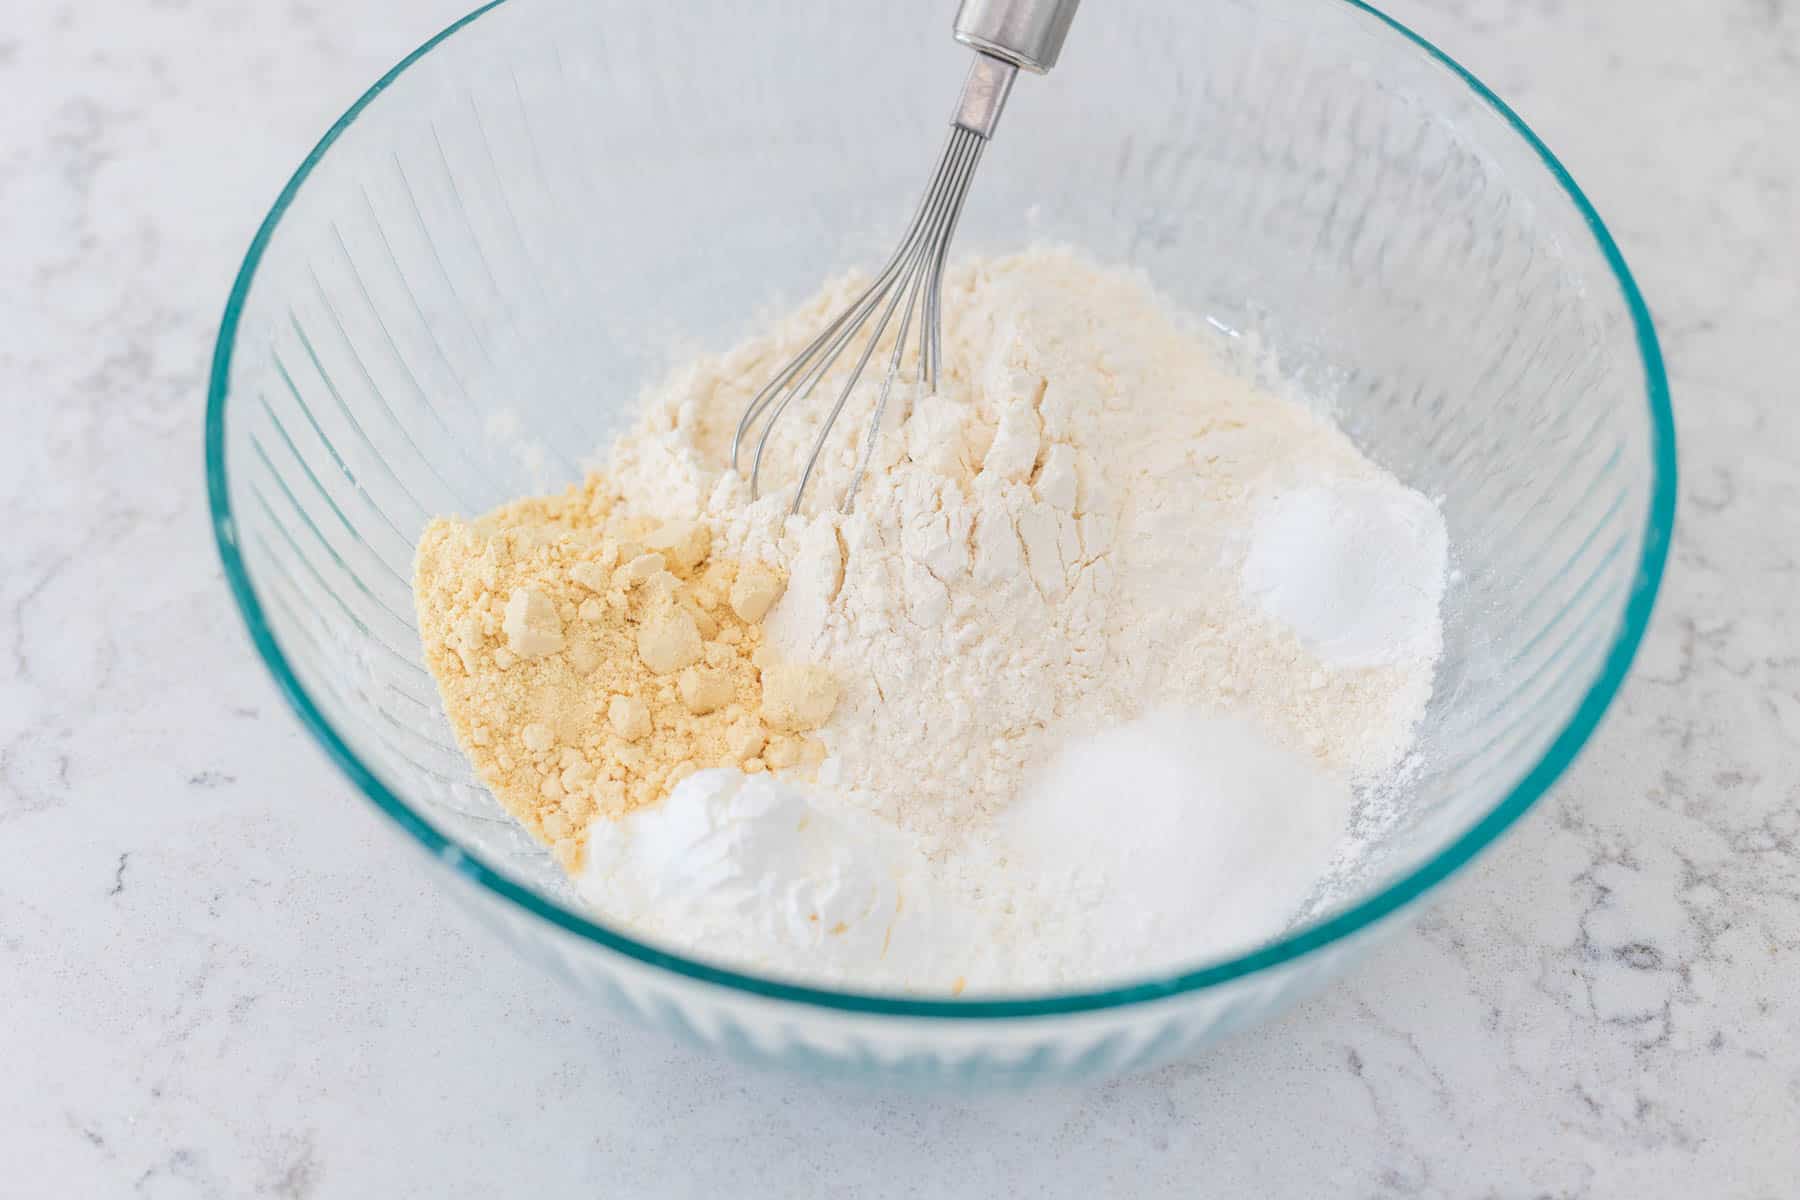
As with all my waffle recipes, youll start by mixing the dry ingredients together first.
Add the flour, cornstarch, malted milk powder, sugar, baking powder, and salt to a large mixing bowl and whisk them together until well combined.
You could do this step in advance and store it in an airtight container in your pantry for up to 6 months if you want to have a DIY waffle mix ready to go.
In a separate measuring cup, combine the milk and vanilla.
Add the eggs and whisk them together till smooth.
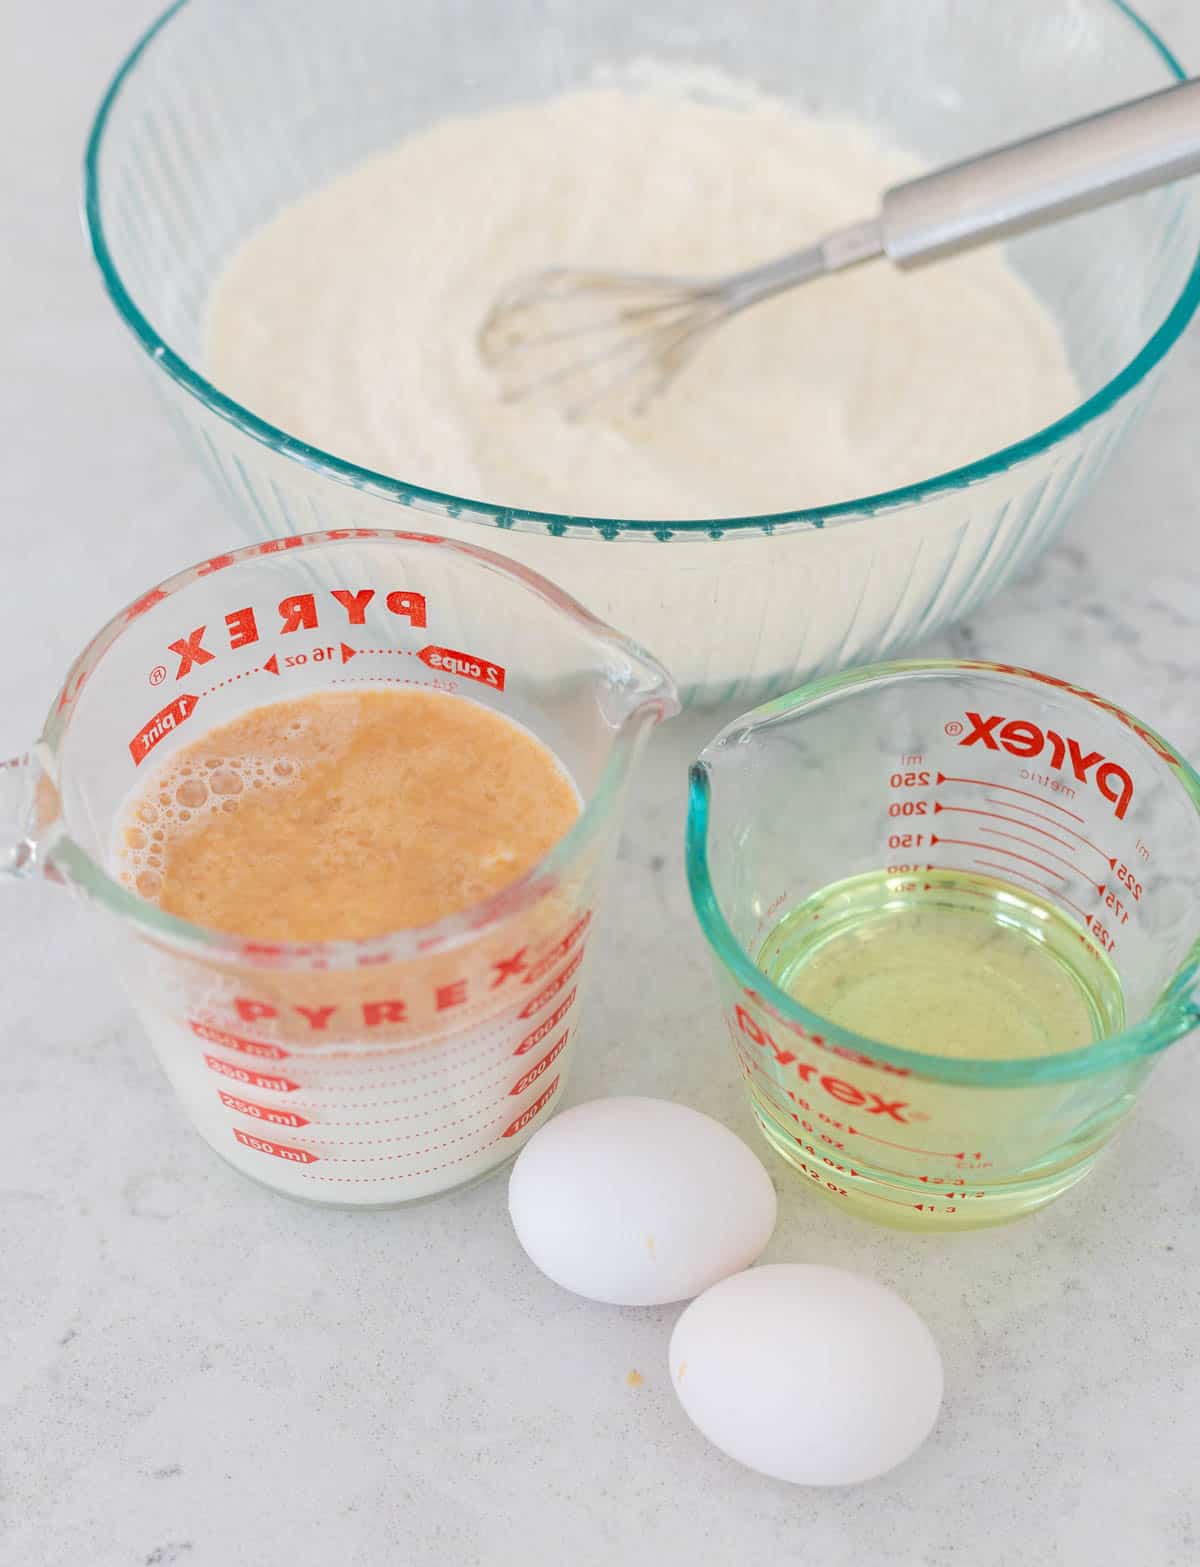
Pour the milk mixture and the vegetable oil into the dry ingredients.
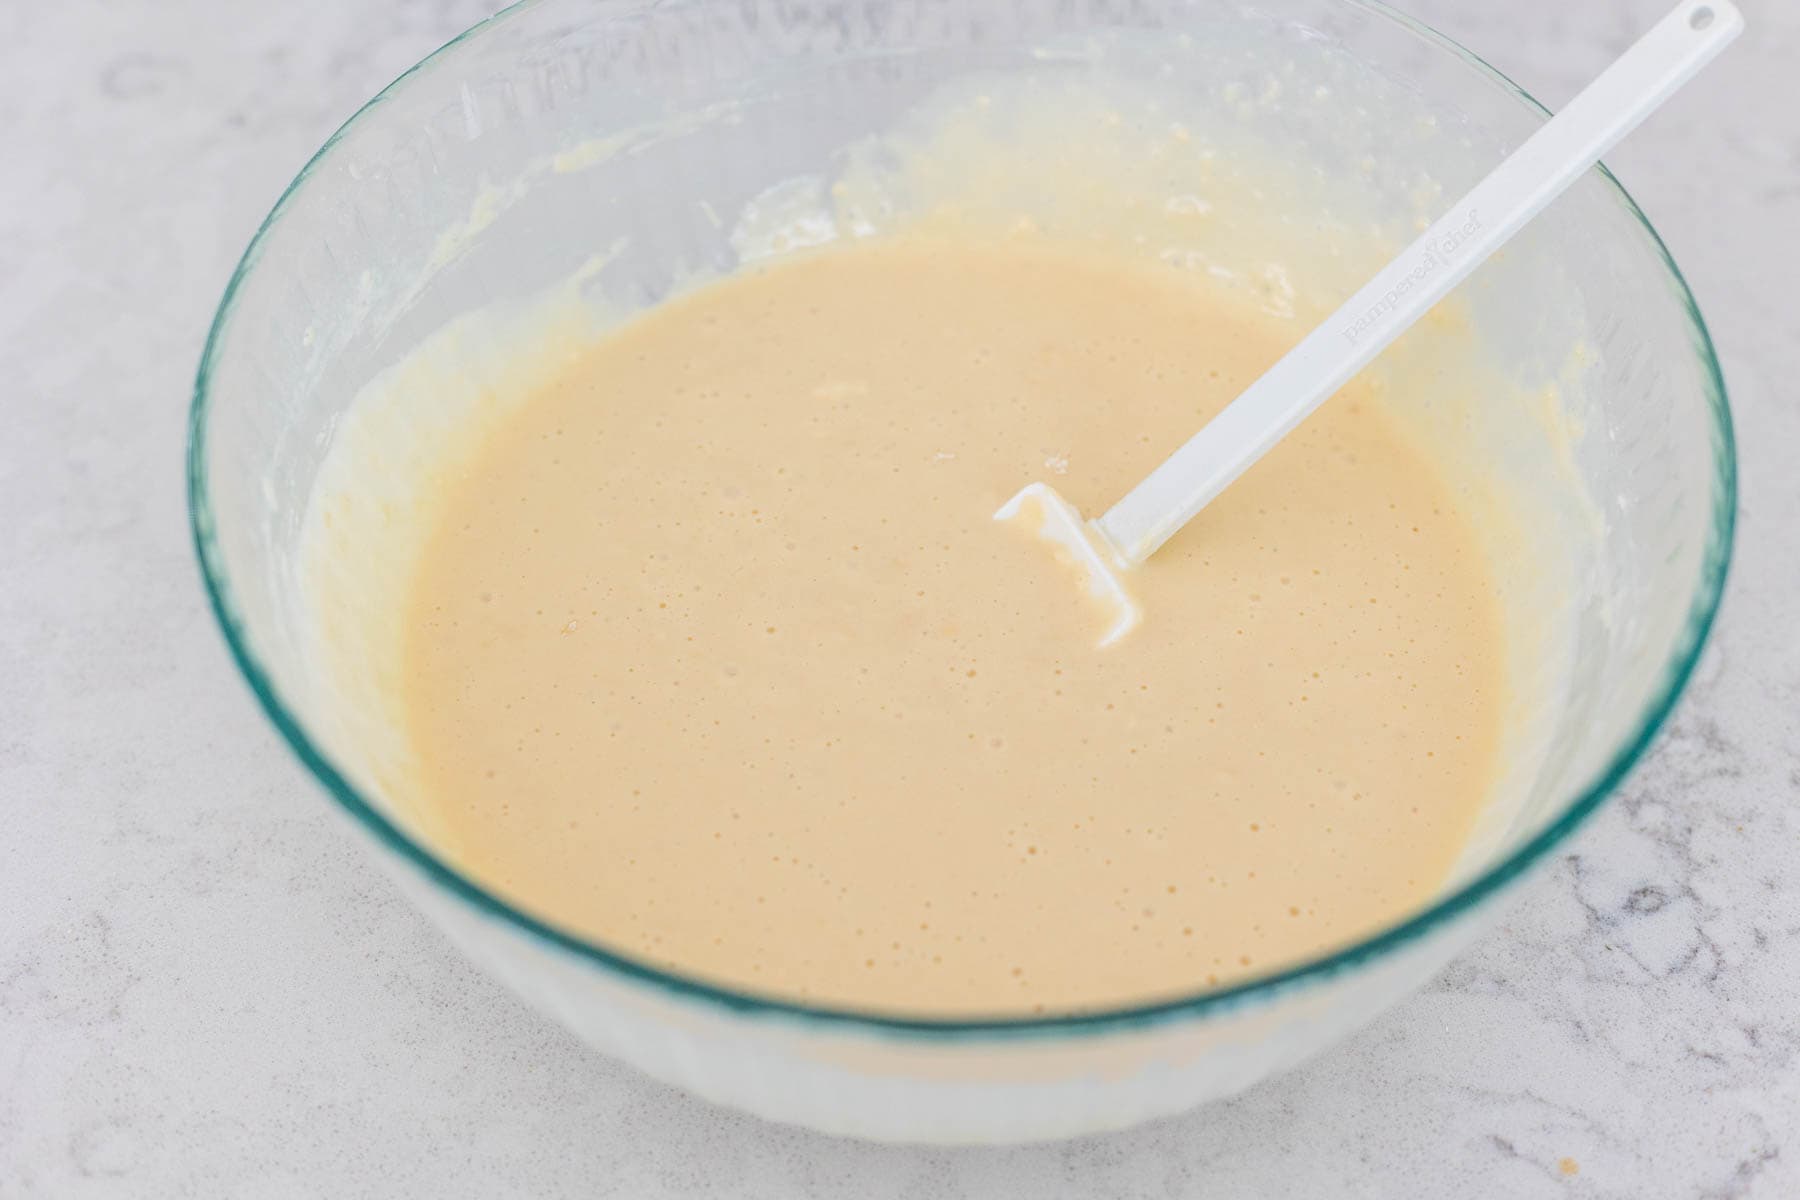
Stir it all together until well combined. Stop as soon as there are no more dry pockets of flour.
The batter will be very thin and have small lumps. Do not over mix the batter.
Preheat your waffle maker. My waffle maker lets me know it is ready to cook when the light turns green.
Spray the wells with cooking spray.
I add 1/3 cup batter to each of the four wells.
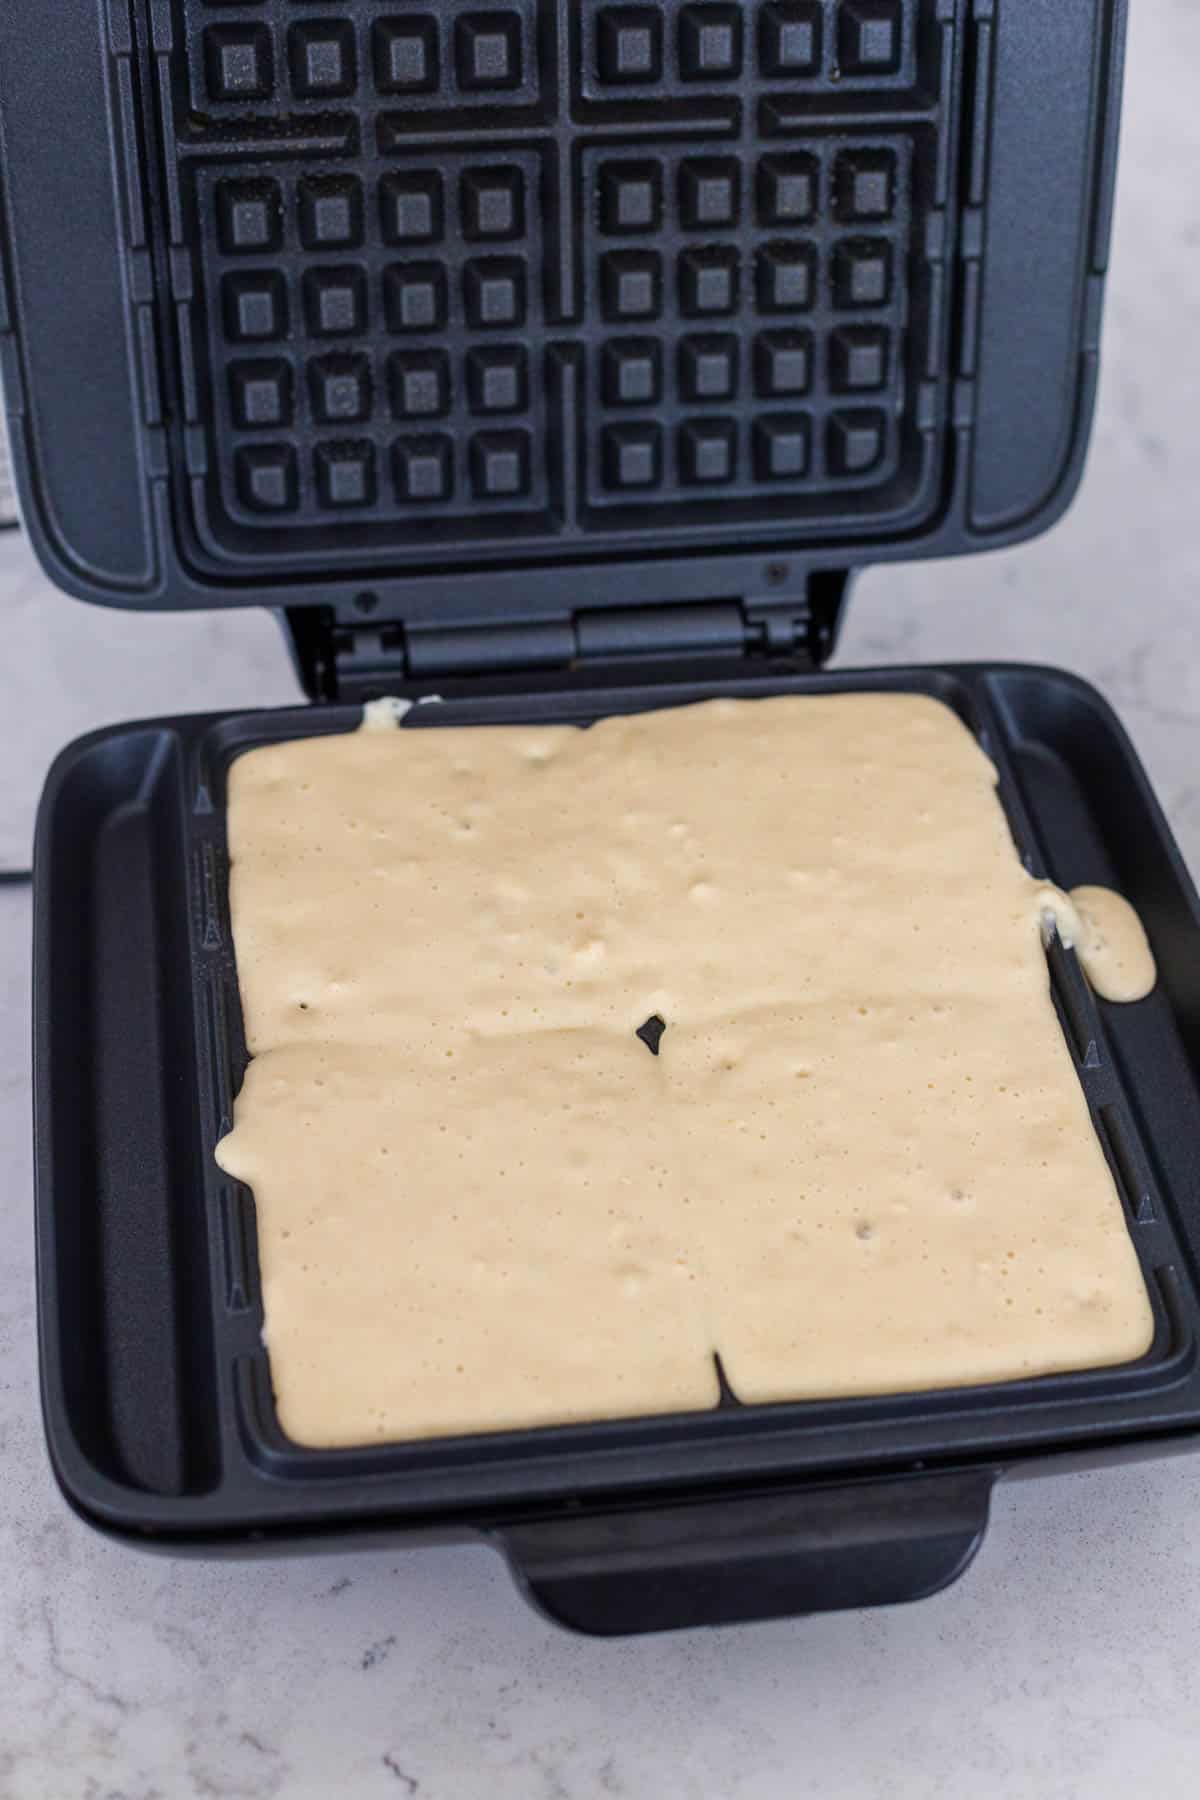
My waffle maker takes 4 minutes to cook the waffles to a perfect golden brown color:
Why This is the Best Recipe
Gosh do I love making homemade waffles for my kids. I prep them in big batches for the freezer. I think this is the best malted waffles recipe because:
- Golden Brown and Crispy: These golden malted waffles have the perfect color and texture. Crispy on the outside but tender on the inside. Waffle perfection right here.
- Malted Milk: Hands-down, Ill choose a malt over a plain ice cream shake every time. I love malted milk powder. The flavor it gives the waffles is outstanding.
- Versatile for Sweet or Savory Dishes: Want your breakfast extra sweet? Go the maple syrup route. Want something more savory? These waffles pair perfectly with fried chicken for chicken and waffles or with your favorite breakfast sides like bacon and sausage.
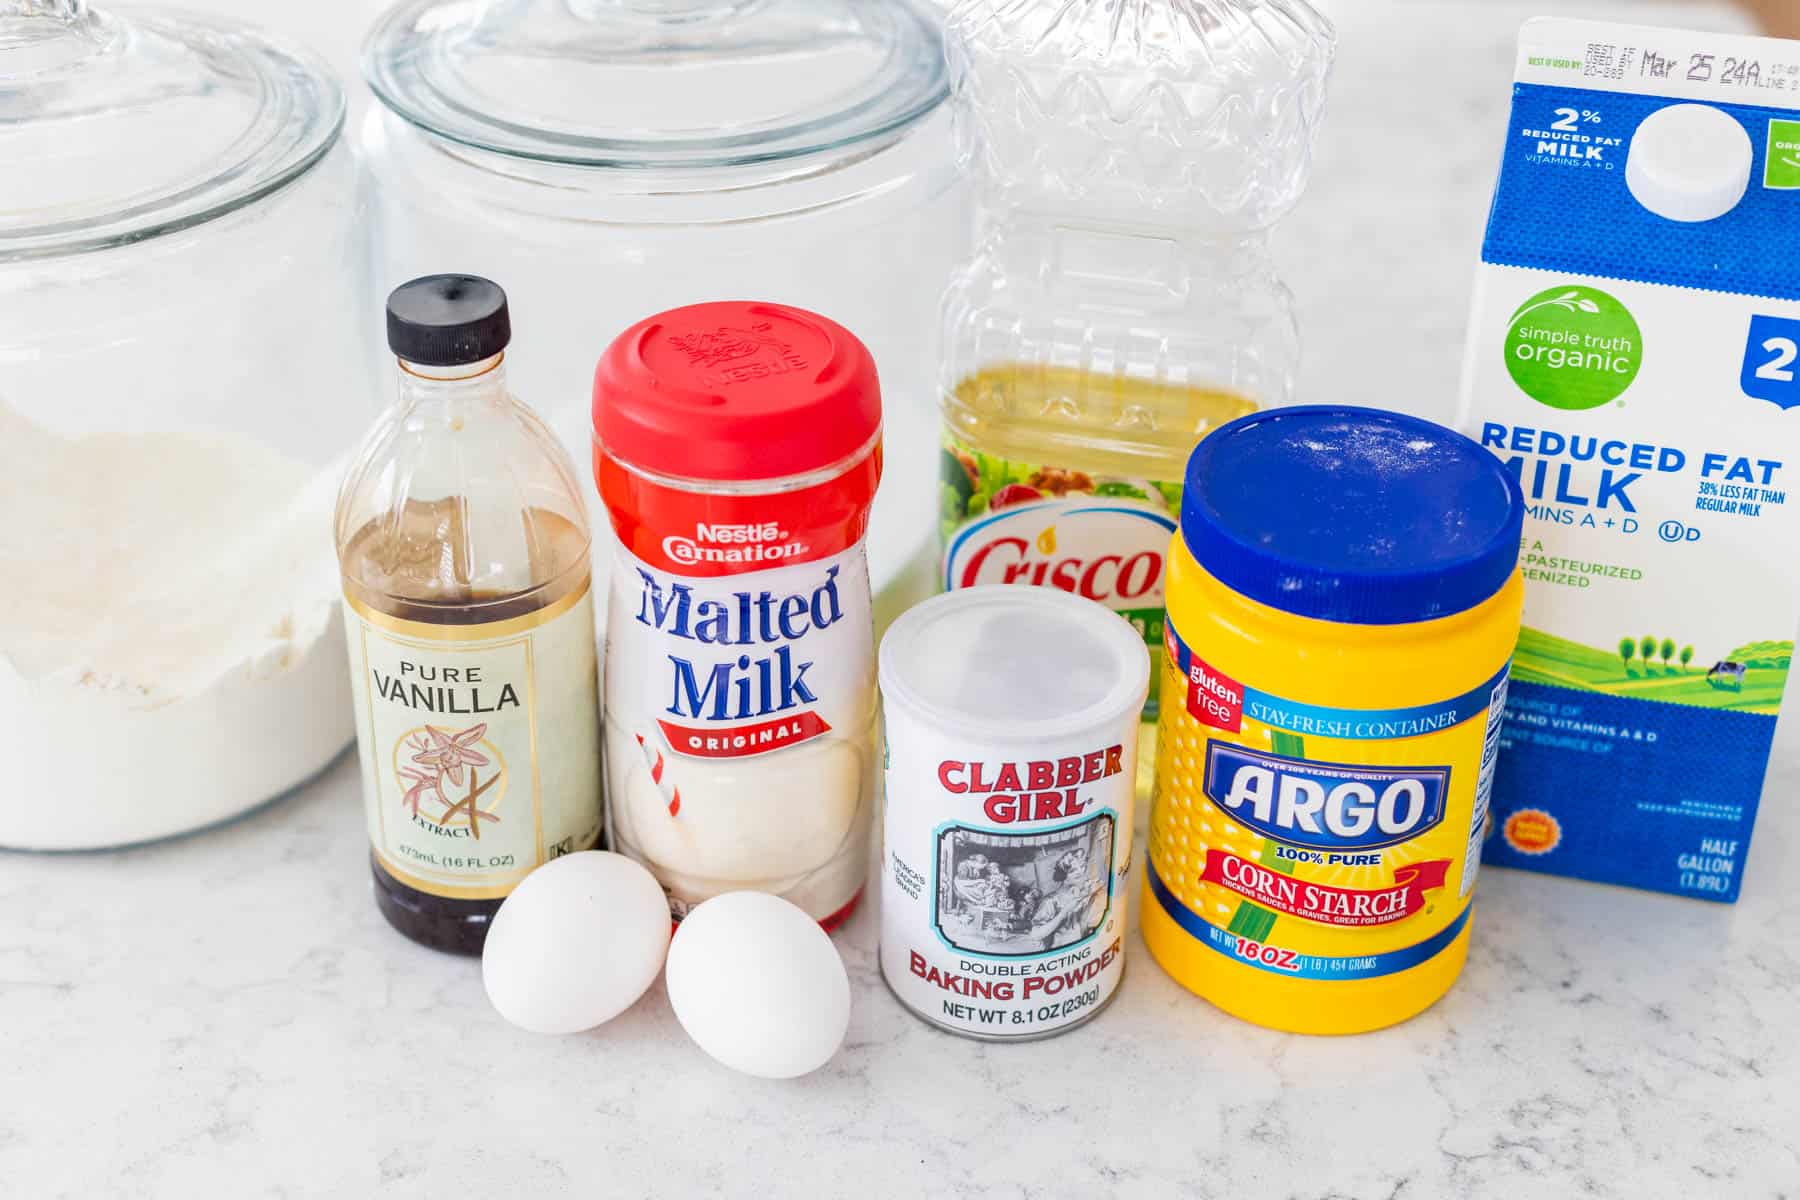
All you need to make these waffles are a few easy pantry ingredients:
- Flour
- Cornstarch: This may sound unusual, but by replacing a bit of the flour with cornstarch, your waffles will be extra-crispy straight out of the waffle maker!
- Malted Milk Powder: This can be tricky to find at the grocery store. You might spot it near the ice cream toppings since it is used for milkshakes but I found it near the hot cocoa mixes. Not all stores carry it, you could order it online here.
- Milk
- Eggs
- Vegetable Oil
- Sugar
- Vanilla
- Baking Powder
- Salt
The tricky part about writing recipes for homemade waffles is that the cooking time and batter quantity per waffle well can vary from waffle maker to waffle maker.
Its always best to follow the instructions for your specific model, but if you want to cook all the waffle recipes on my site with the same quantity and size as what you see in my photos, you can buy my exact same waffle maker here.
The Malted Waffle Co – Overview
FAQ
What is the difference between a waffle and a malted waffle?
Malted Waffles date back to the early 1900’s when bakers were adding malt powder to waffle batter to experiment with flavors. Malt powder gives the waffle are darker color and distinct flavor, much different than regular waffles.
What are the three types of waffles?
- Brussels Waffle. Brussels waffles are big rectangular waffles that are crispy on the outside and fluffy on the inside with large deep pockets. …
- Belgium Waffle. …
- American Waffle. …
- Toaster Waffle. …
- Hong Kong Egg Waffles. …
- Liege Waffle. …
- Pizzelle. …
- Waffle Cone.
Why do restaurant waffles taste better?
Several factors contribute to why restaurant waffles often taste better than homemade ones: Ingredients: Restaurants typically use high-quality ingredients, including fresh eggs, premium flour, and sometimes even specialty mixes that enhance flavor and texture.
Does Disney use golden malted waffle mix?
Until I FINALLY got it just right. My first secret to the perfect Mickey Waffle is the mix. Disney World uses a mix called Carbon’s Golden Malted Waffle and Pancake Flour. This is NEEDED to make sure you get that great Mickey Waffle taste. To order it, click here. The next secret is getting that perfect Mickey shape.